Filter
Scylla | A Newly Discovered Supernova Remnant in Cepheus by Team DSC
Scylla | A Newly Discovered Supernova Remnant in Cepheus by Team DSC

Scorpius Claw | Sh2-1 and the LBN Dust Clouds
Scorpius Claw | Sh2-1 and the LBN Dust Clouds
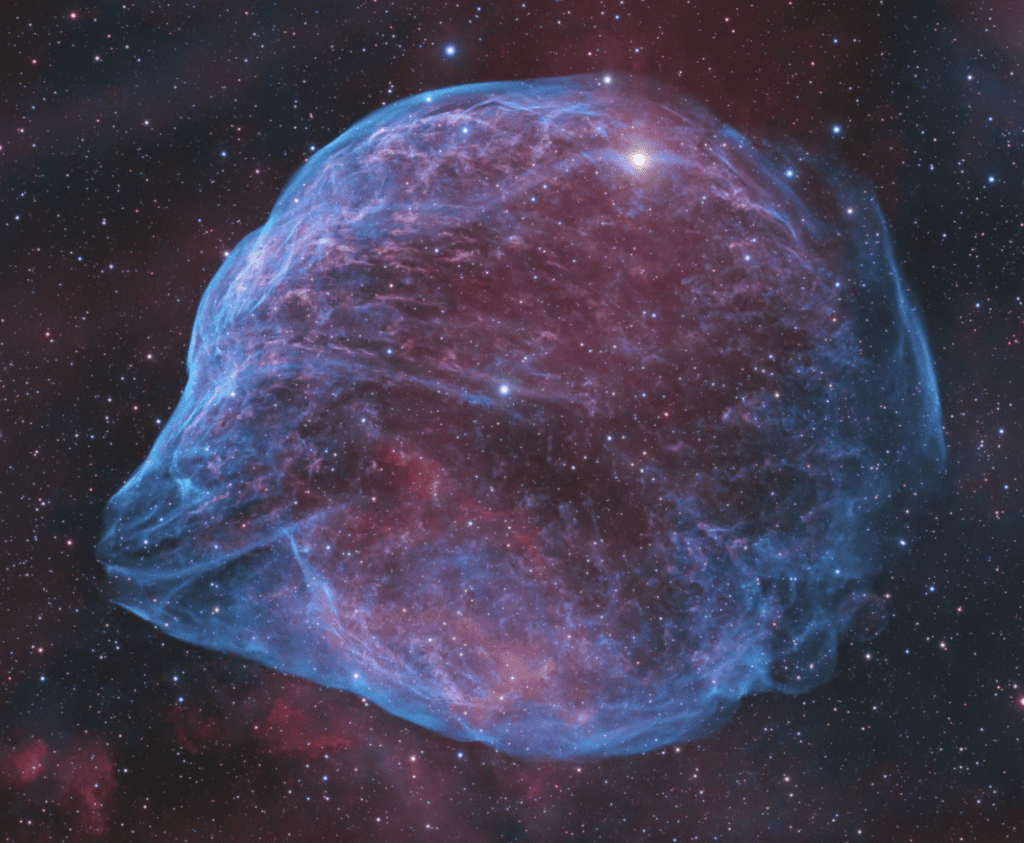
SH2-308 | The Dolphin Head Nebula
SH2-308 | The Dolphin Head Nebula
KX Andromedae – Bipolar Jets of an Interacting Binary Star by Team DSC
KX Andromedae – Bipolar Jets of an Interacting Binary Star by Team DSC

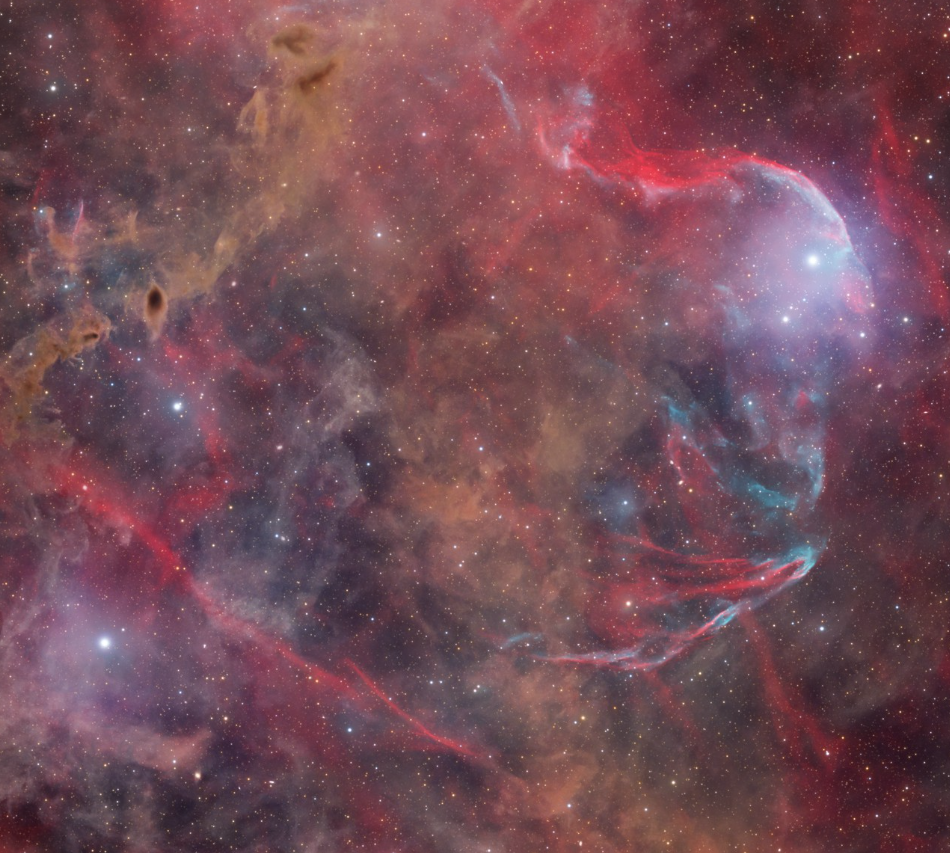
SNR G182.4+4.3 in a field of dust by Team DSC
SNR G182.4+4.3 in a field of dust by Team DSC
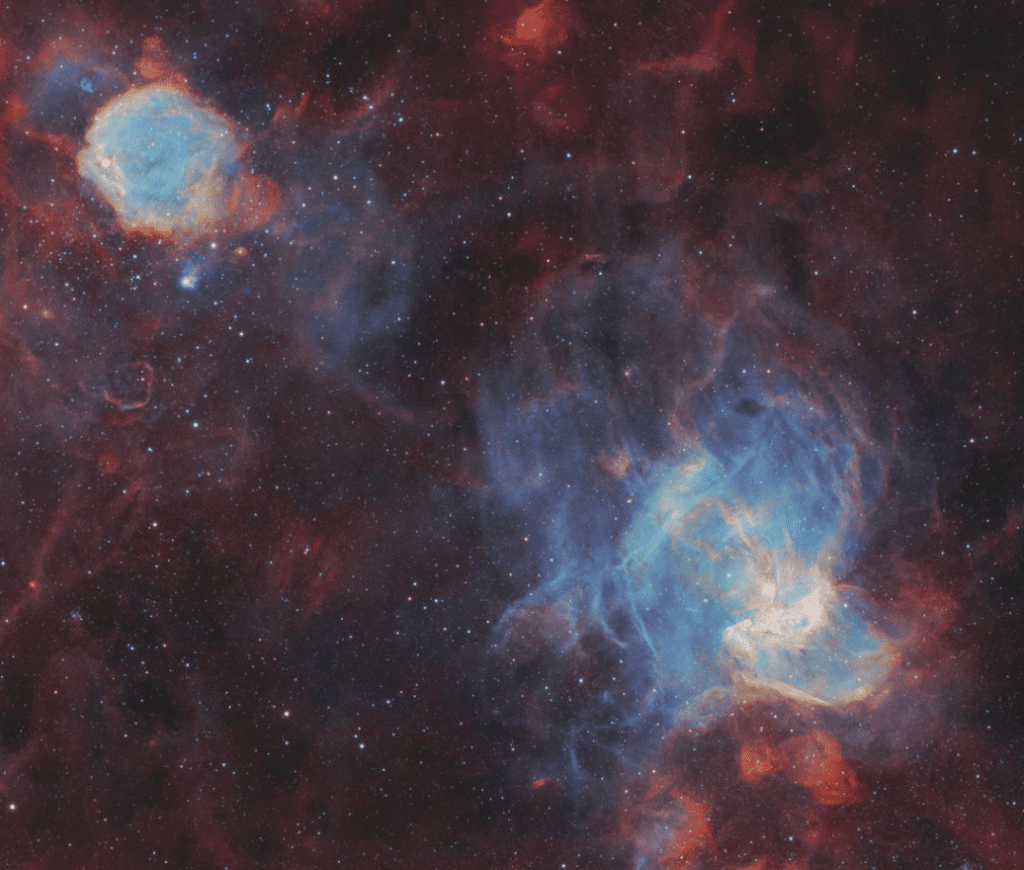
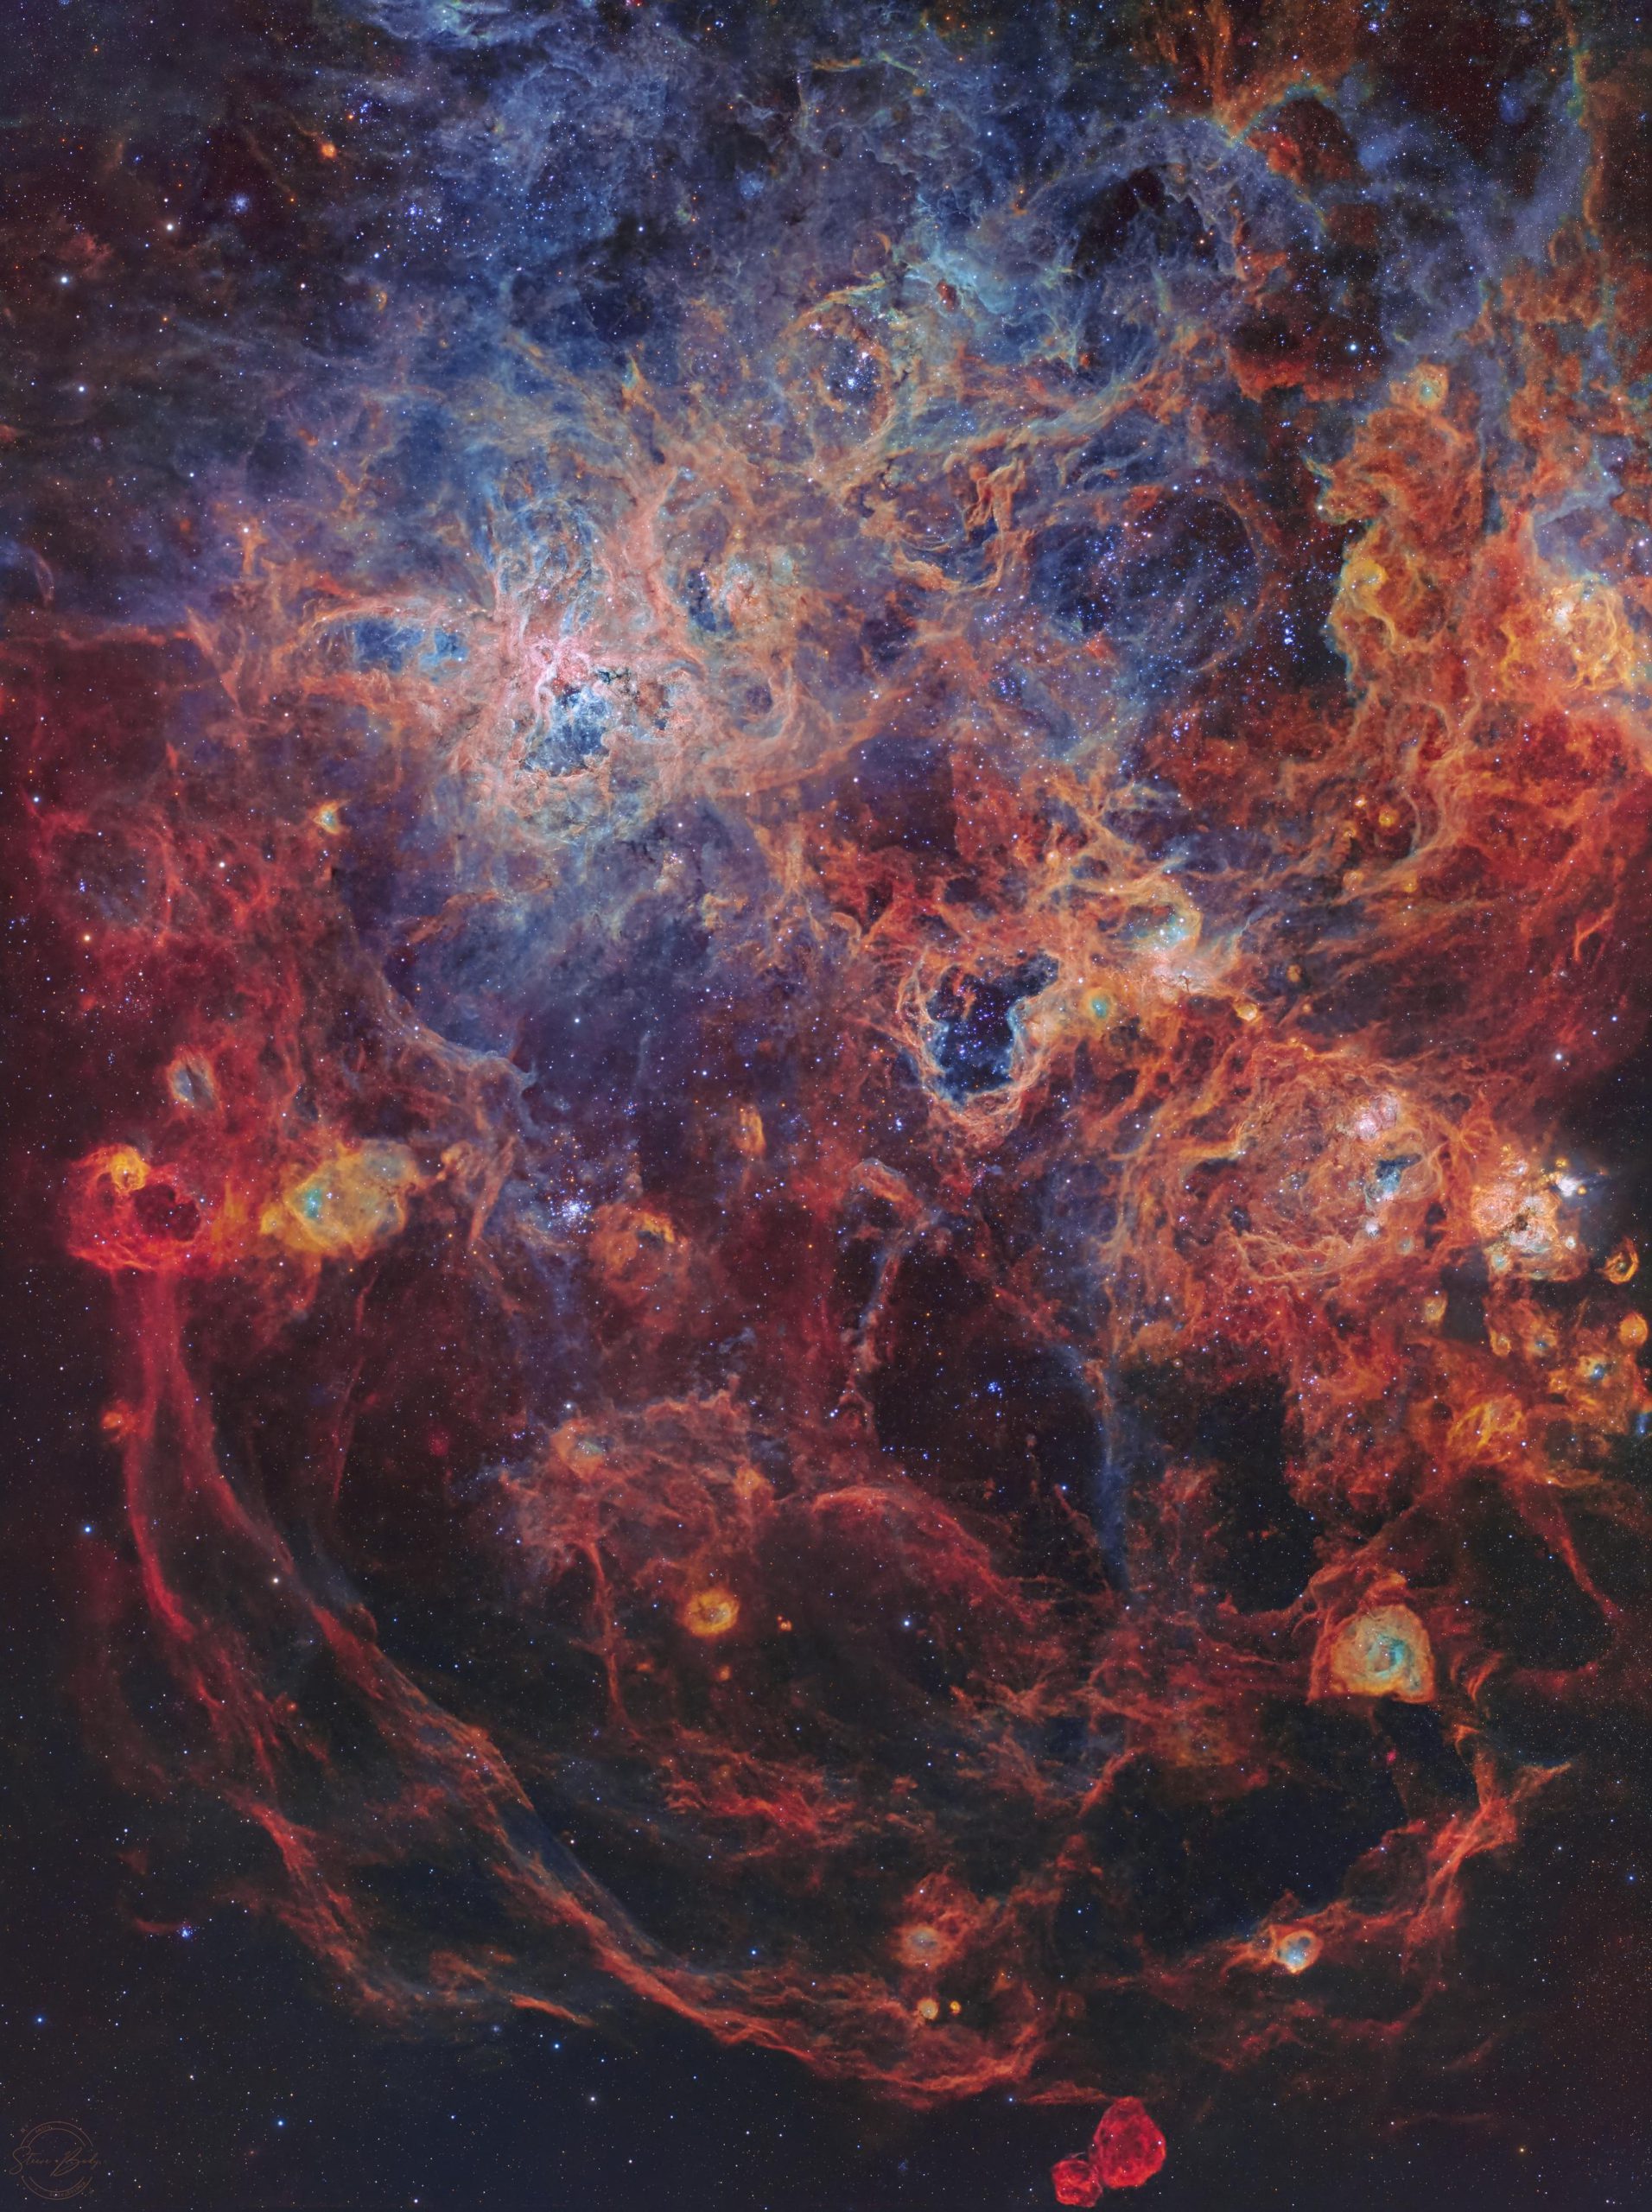
The Birds of Magellan (Detailed View of the Northern Small Magellanic Cloud)
The Birds of Magellan (Detailed View of the Northern Small Magellanic Cloud)

NGC 6334 | Tyke’s Paw Nebula
NGC 6334 | Tyke’s Paw Nebula

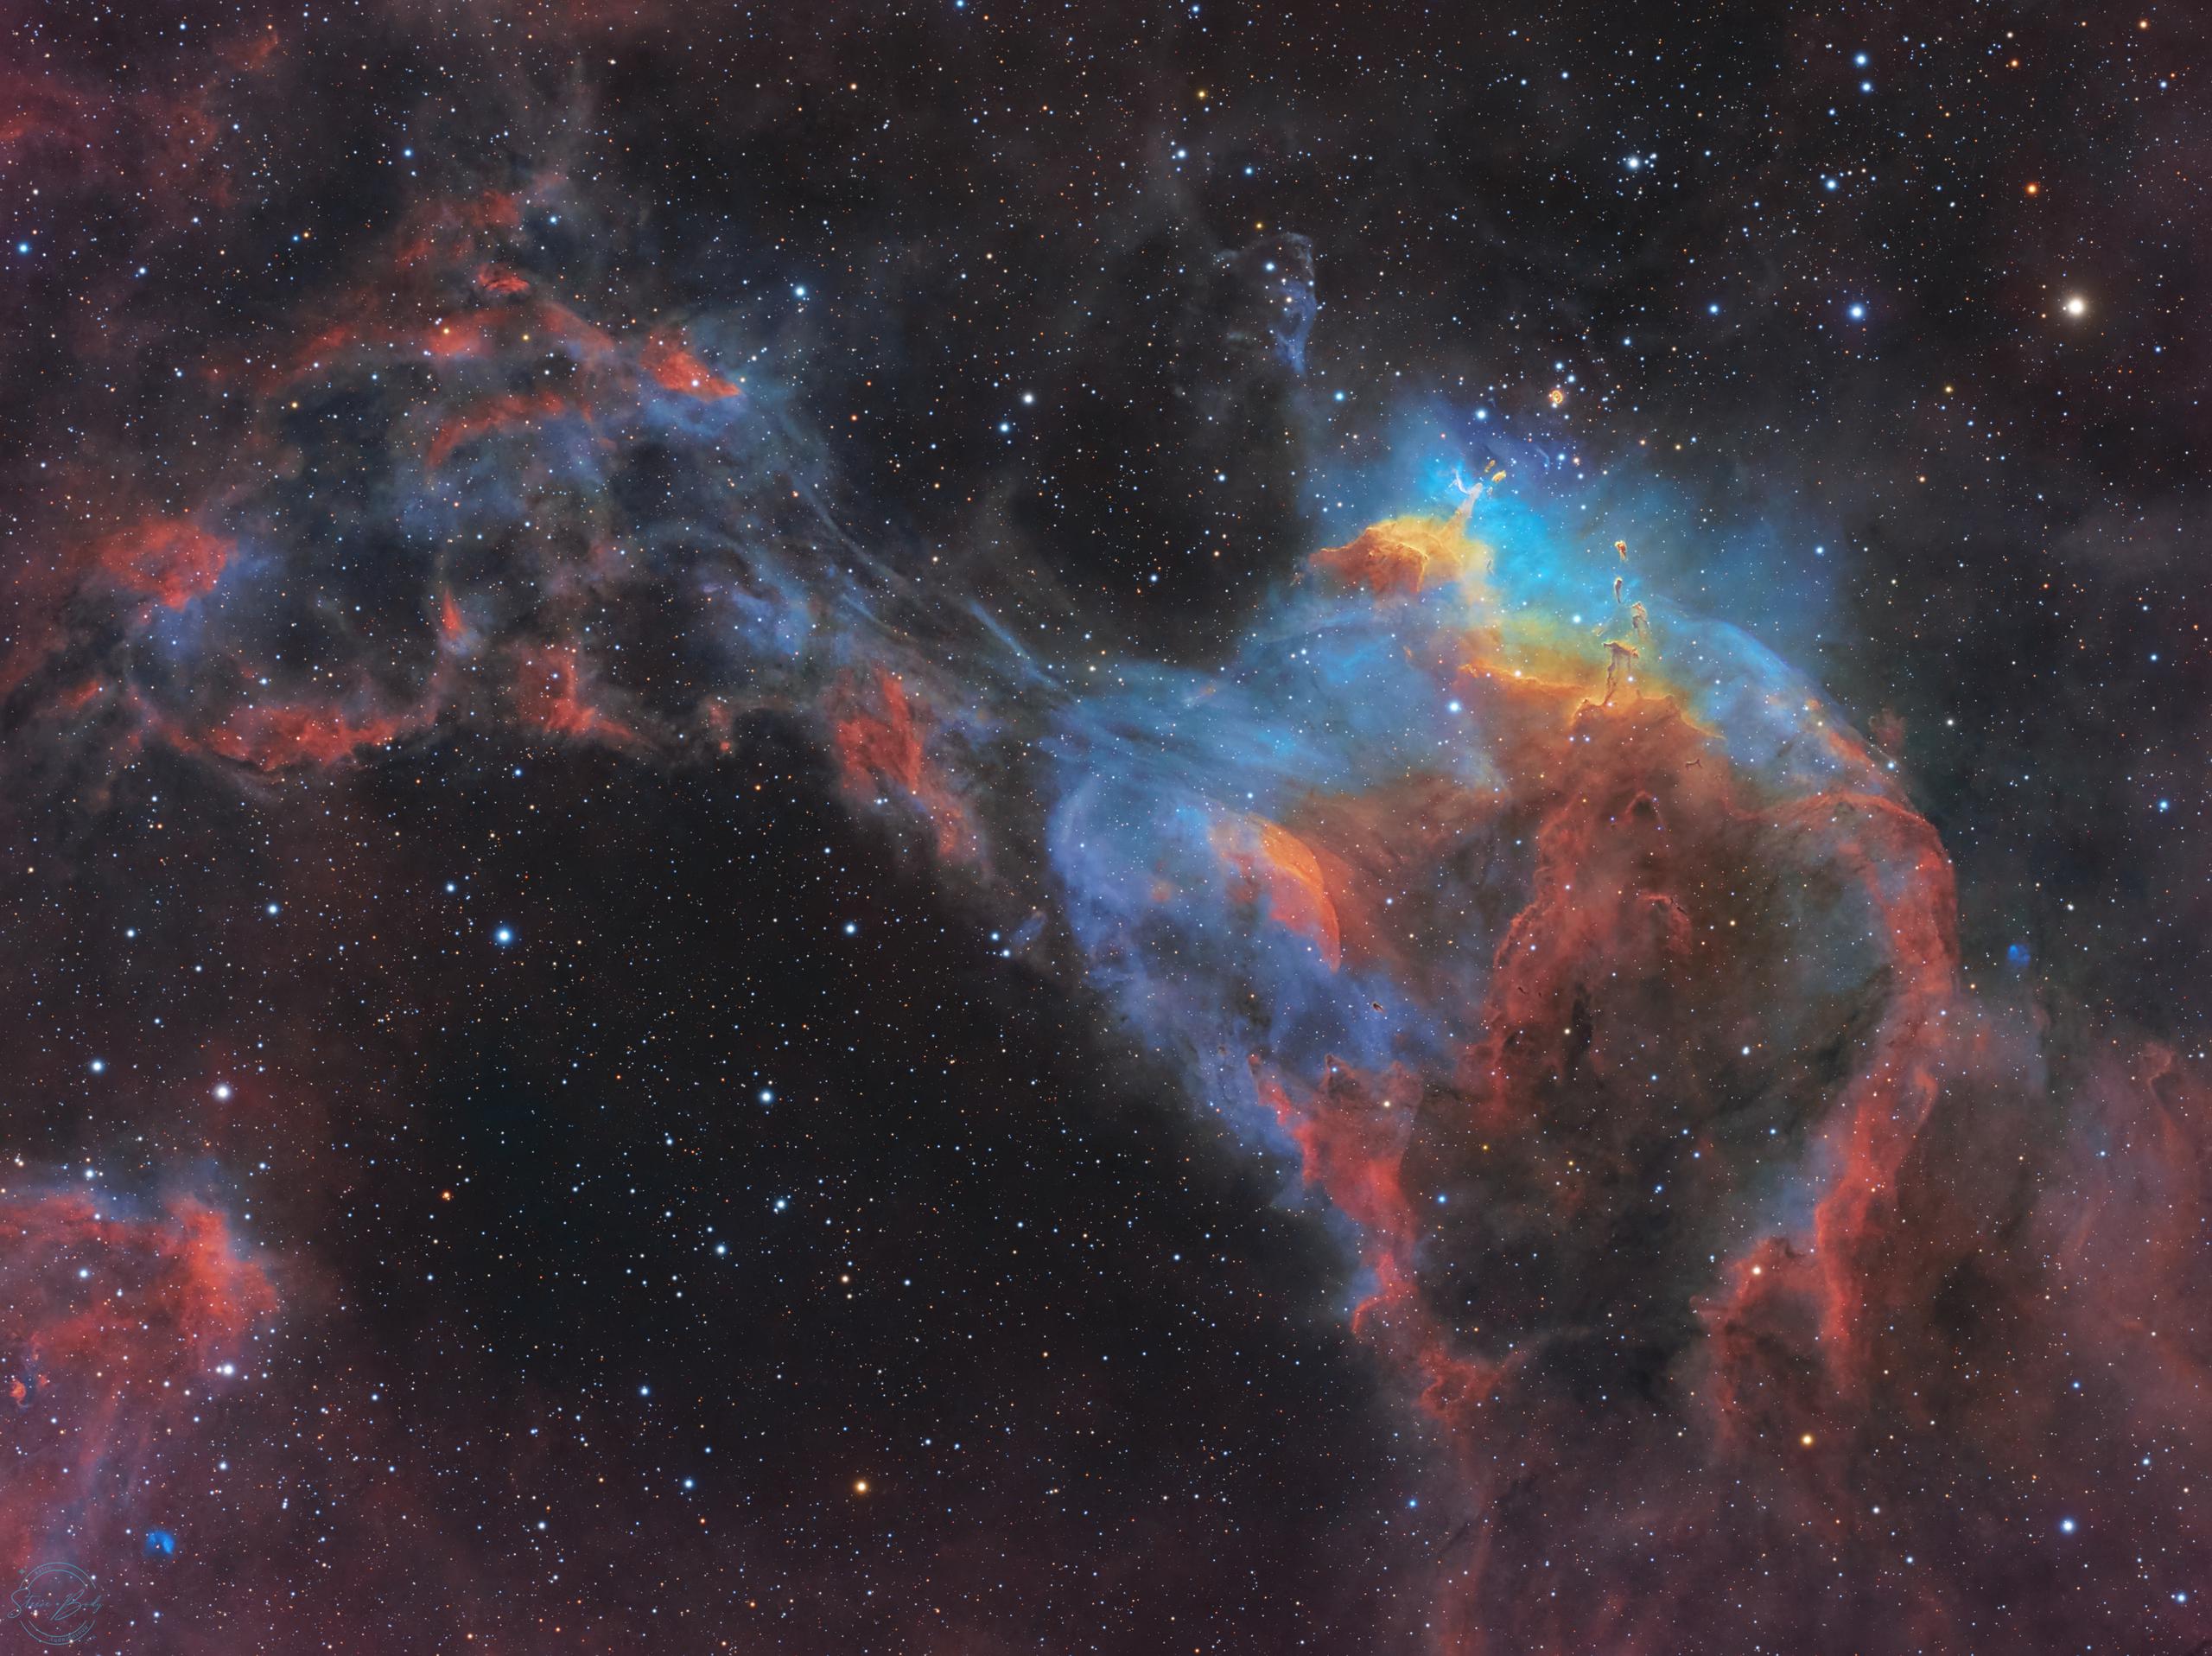
The Dark Wolf and the Dragons Heart Nebulae
The Dark Wolf and the Dragons Heart Nebulae

M31 Ghost Planetary Nebula – Introducing SDSO1 Bow Shock
M31 Ghost Planetary Nebula – Introducing SDSO1 Bow Shock

The Chamaeleon III Dark Molecular Cloud
The Chamaeleon III Dark Molecular Cloud

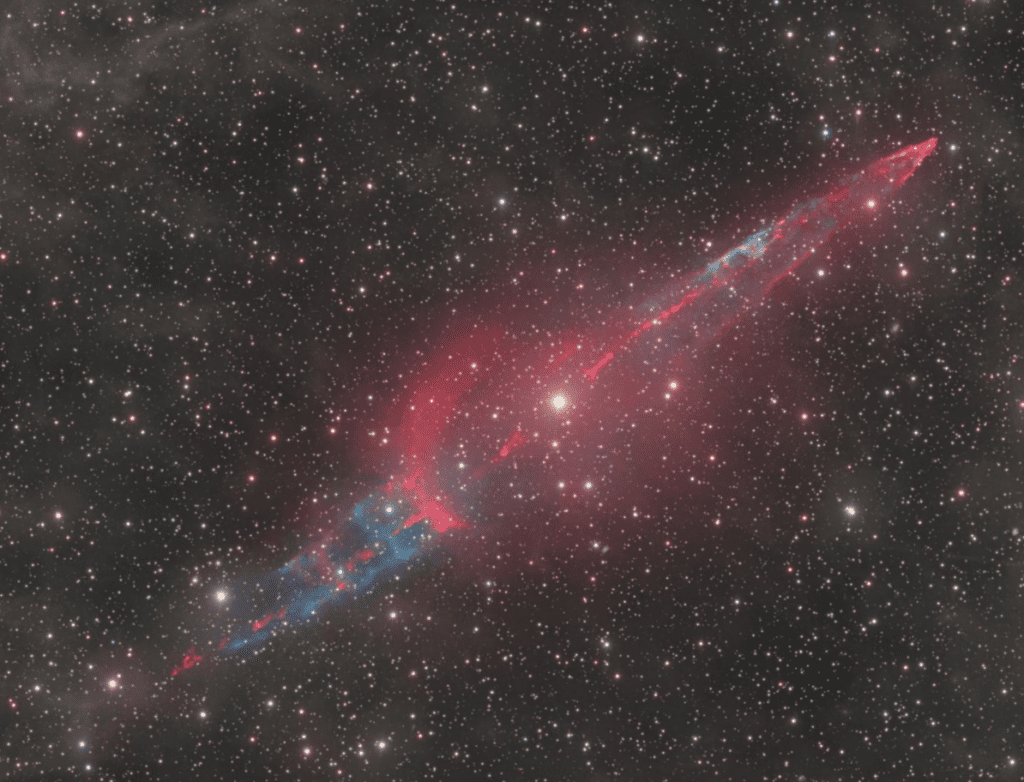
The Vela Supernova Remnant
The Vela Supernova Remnant

Deer Lick and Stephan’s Quintet by Team DSC
Deer Lick and Stephan’s Quintet by Team DSC
From Fascination to Realisation
Ever since I was a child, the night sky held my attention in a way little else did. Growing up reading about planets, nebulae, and galaxies, I wanted to become an astronomer. After finishing high school, I enrolled in a BA in Physics at the University of Réunion Island, but I’m a creative person at heart, and the gap between what I was studying and how I wanted to express myself eventually became too wide. I put astronomy on hold and followed my other passion into a career in music.
The love for the sky never went away. Decades later, I discovered astrophotography, and it brought everything back together. It challenges me technically and creatively in equal measure, and it’s given me a way to reconcile something I thought I’d left behind.
I’m based in Melbourne. For a while I imaged from my backyard, working within the constraints of city skies, but my setup now lives at a remote observatory under genuinely dark skies. I also have access to additional remote telescopes in both the southern and northern hemispheres, which has opened up targets and integration depths that simply weren’t possible before.
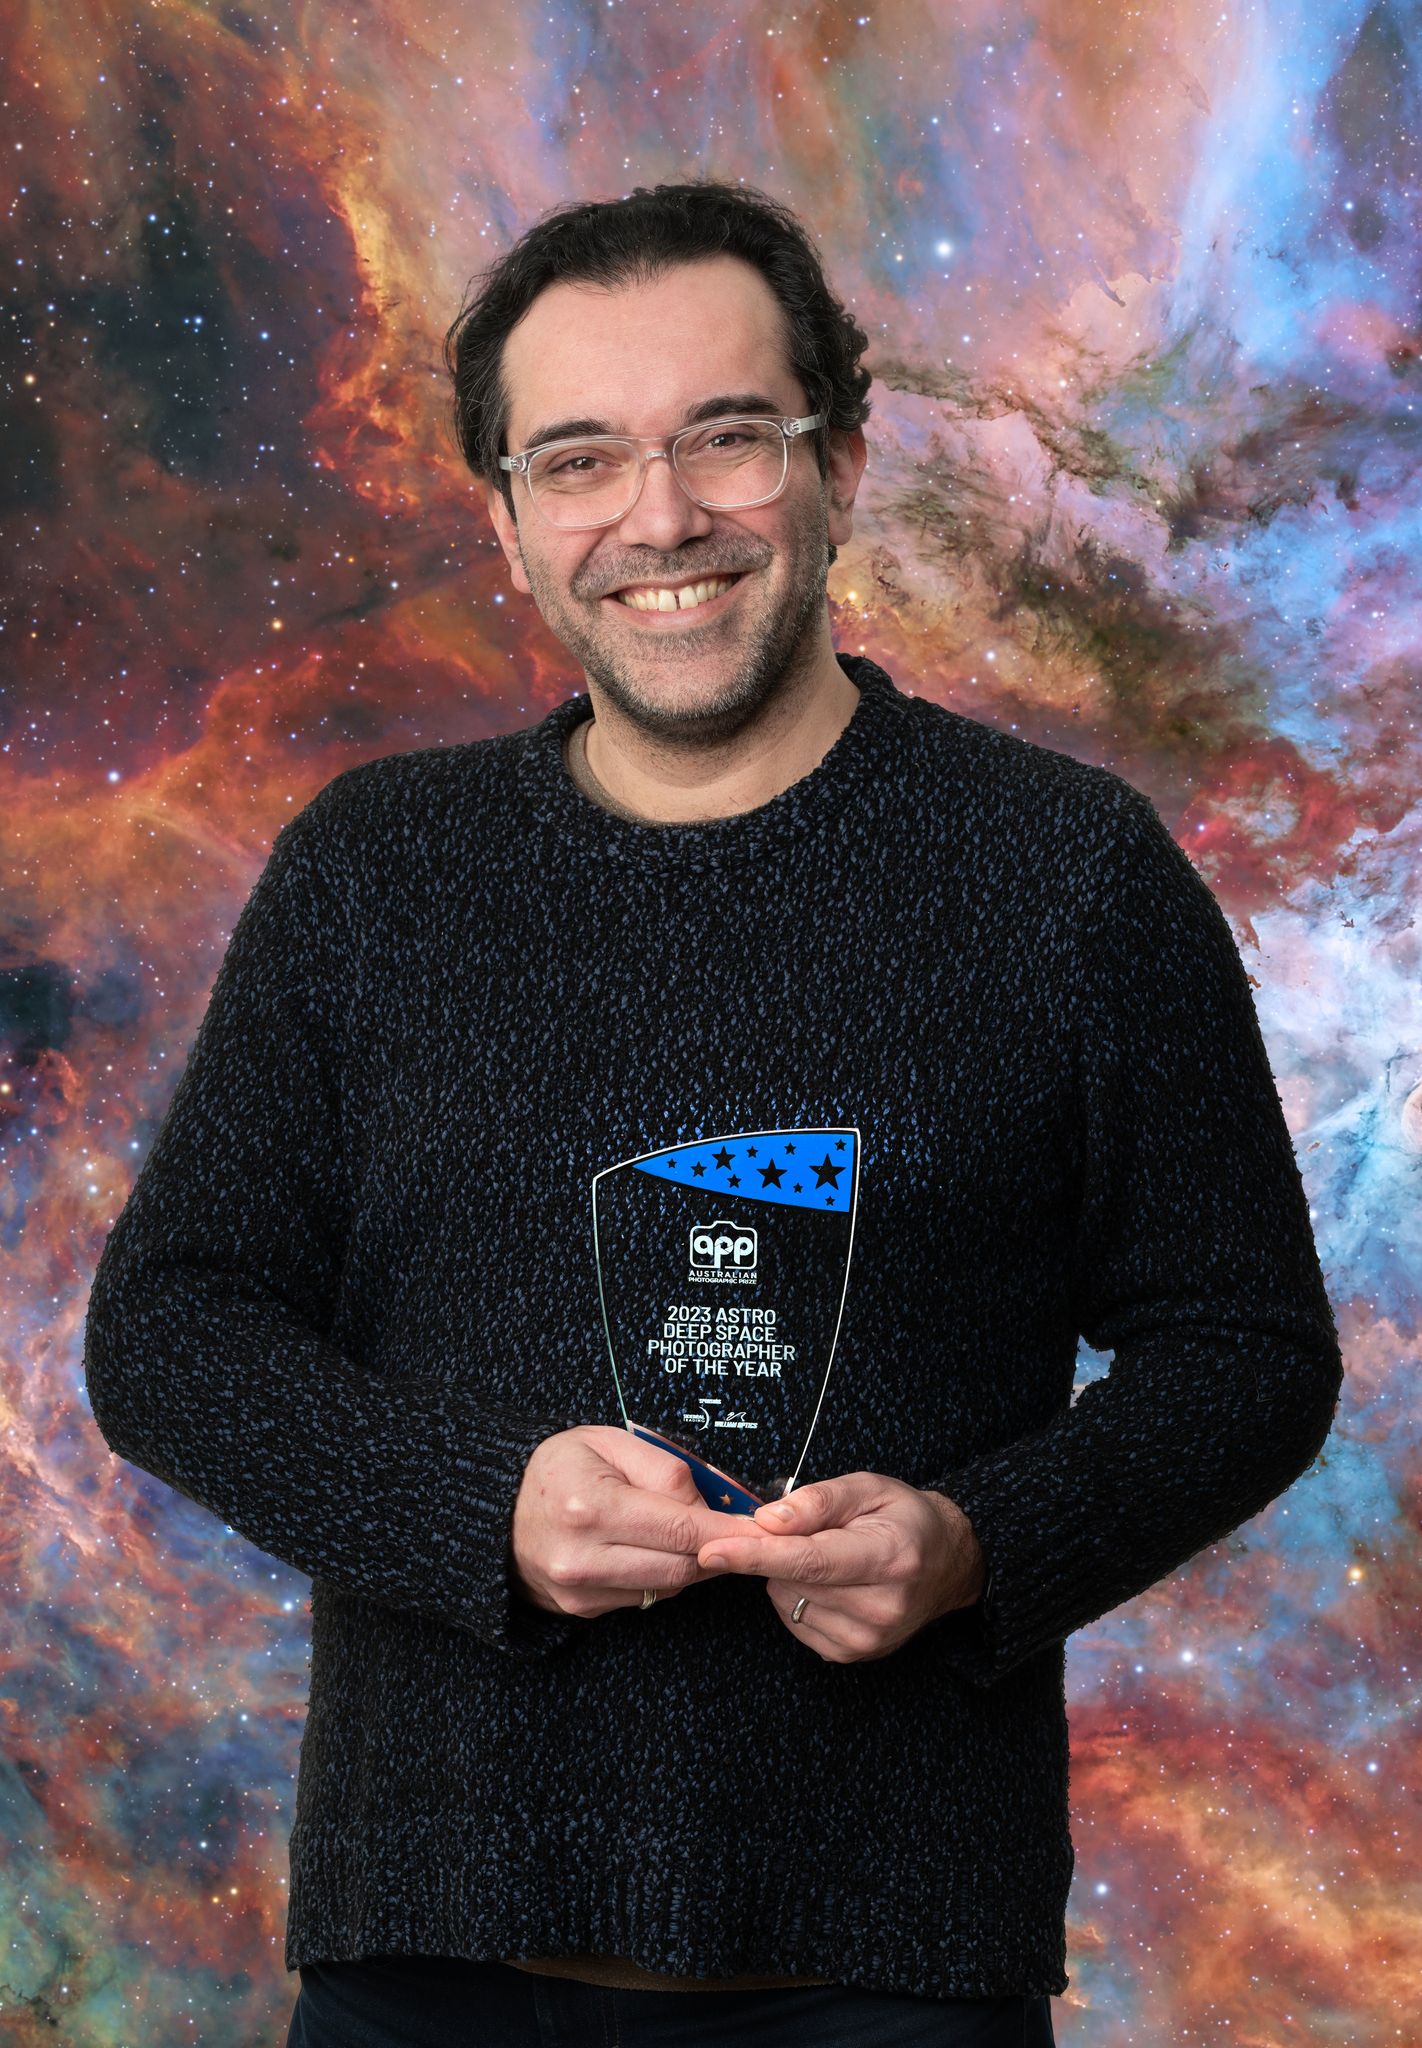
Australian Photographic Prize Deep Space Photographer of the Year 2023 Winner
Astrophotography Equipment
Astrophotography is fundamentally about capturing light, extremely faint light that may have travelled for thousands or millions of years before reaching a camera sensor. That demands specialised equipment, careful technique, and a lot of time. Many of my personal images carry 20 or more hours of total exposure. Through my collaboration with the Deep Sky Collective, a group of astrophotographers working across multiple telescope systems, some projects push well beyond 500 hours of integration to reveal structure at the very edge of what’s detectable. Processing each image then takes weeks, sometimes months, using dedicated scientific imaging tools.
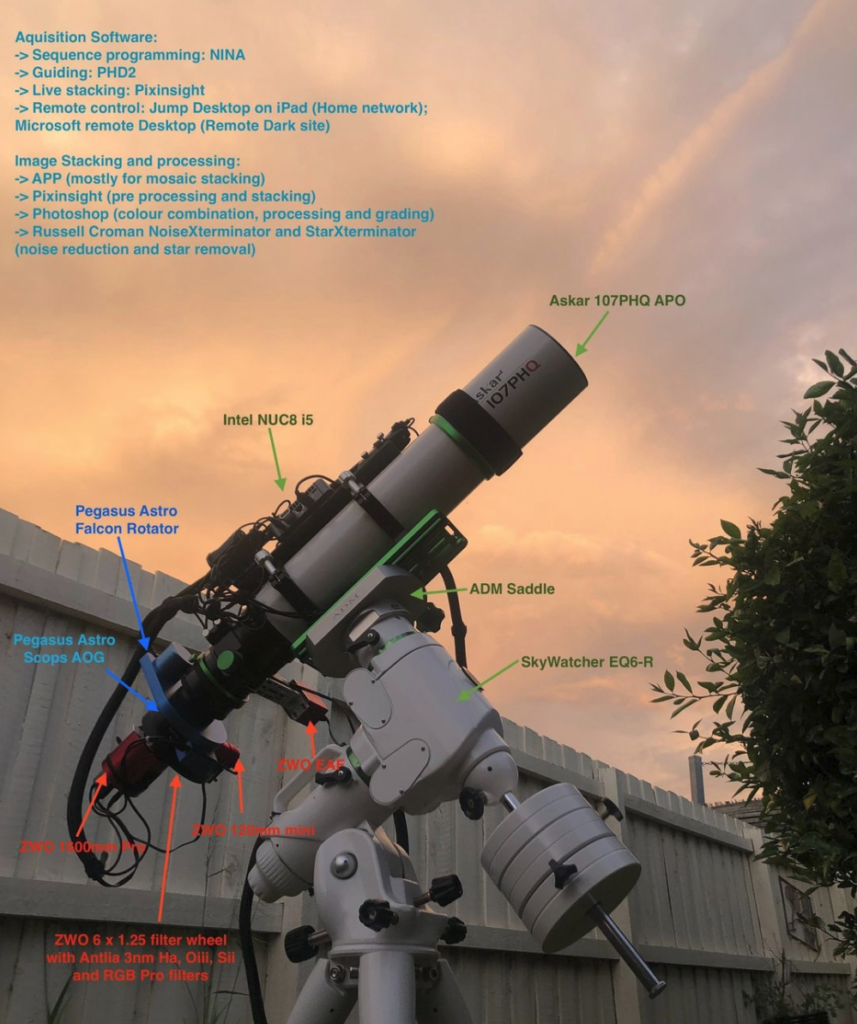
Here is a list of the current equipment I use:
Telescope: Askar 107 PHQ
Imaging Cameras: ZWO ASI 1600 MM Pro
Mounts: Sky-Watcher EQ6-R Pro
Filters: Antlia 3nm Ha, Antlia 3nm Oiii, Antlia 3nm Sii, Antlia Blue Pro · Antlia Green Pro · Antlia Luminance Pro · Antlia Red Pro
Accessories: Intel NUC 8 · Pegasus Astro Falcon Rotator · Pegasus Astro Powerbox Micro · Pegasus Astro Scops OAG · Pegasus Astro USB Hub · ZWO EAF
Software: Adobe Photoshop · Pleiades Astrophoto PixInsight · Russell Croman Astrophotography BlurXTerminator · Russell Croman Astrophotography NoiseXTerminator · Russell Croman Astrophotography StarXTerminator
Time Travel Through Light
A Story Behind Each Image
Every photograph is a journey through time. It connects the past to the present. Moreover, it forges a bond that spans thousands, if not millions, of years. Find below and interesting video from NASA that may be helping you in visualising the speed of light at a solar system scale.
Now lets think on a larger scale. Every single of my photographs are not just a series of snapshots. Each image is like a time machine. Lets Illustrate this with a couple of example. The Tarantula Nebula light started its journey 159,800 light years away. Our ancestors, such as Homo Erectus, were on Earth at that time. While they were mastering fire and stone tools, these age-old photons embarked on an epic voyage. Today, they glow, capturing our species’ history.
The Tarantula Nebula as seen today peering 159800 years into the past.
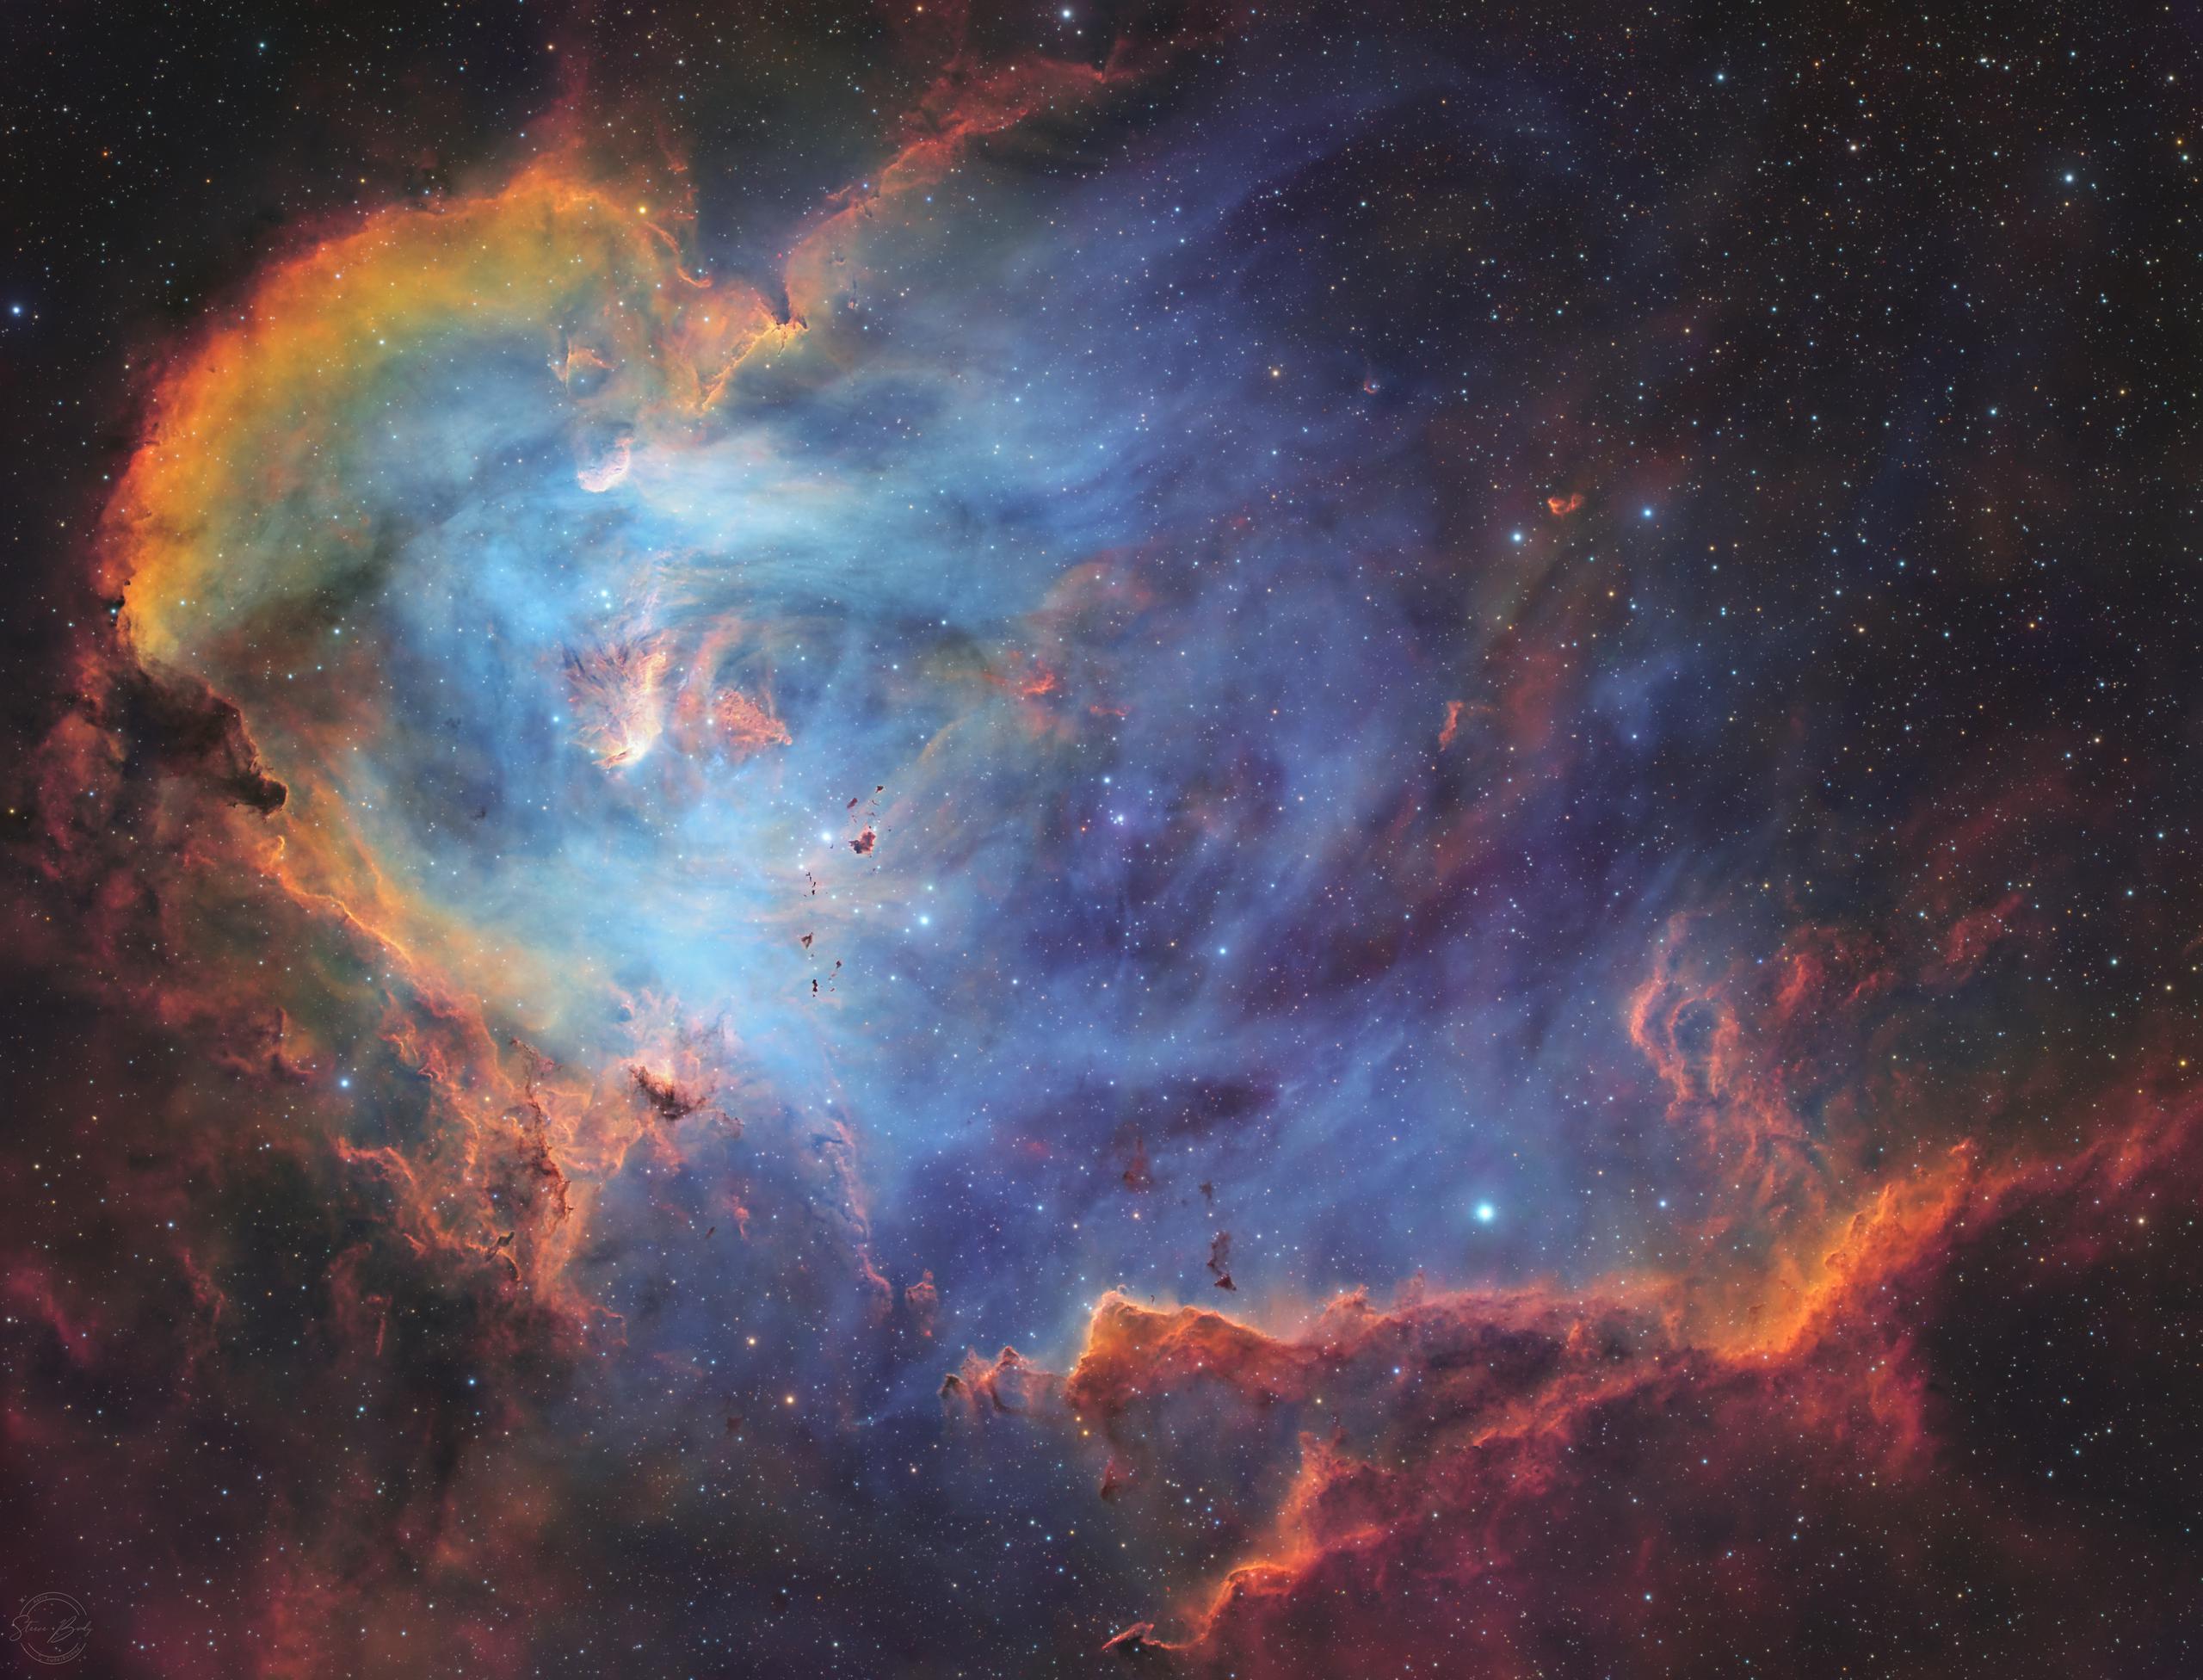
IC2944 The Running Chicken Nebula. 6523 year old light captured in 2023
Similarly, with this image of The Running Chicken Nebula, or IC2944, the photons started their journey in the fifth millennium BC. At that time, we were recording our thoughts with the earliest writing systems. Thousands of years later, they landed on my camera sensor.
Image Acquisition
The Heart of Astrophotography: Cooled Astronomy Camera
The use of a specialised, temperature-controlled monochrome camera is key. With the camera set to approximately -10 degrees, noise is suppressed, yielding high-definition images. To explain further, a monochrome camera enhances sensitivity, a crucial aspect of astrophotography. A colour camera uses a Bayer matrix, separating incoming photons into red, green, and blue pixels. On the other hand, a monochrome camera equipped with filters captures one type of photon at a time, significantly increasing sensitivity.
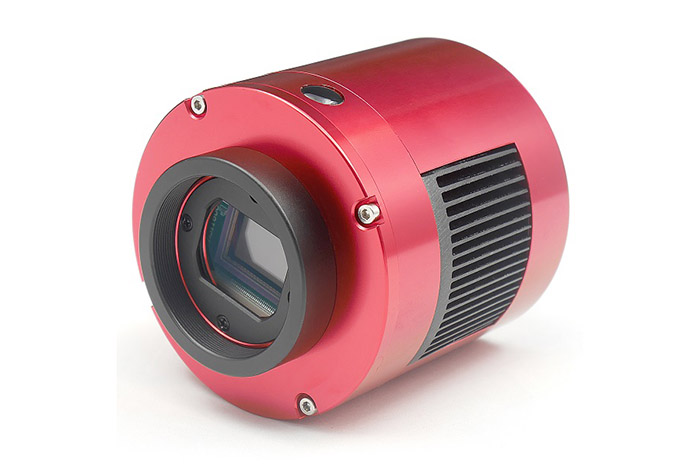
Cooled Monochrome Astronomy CMOS Camera
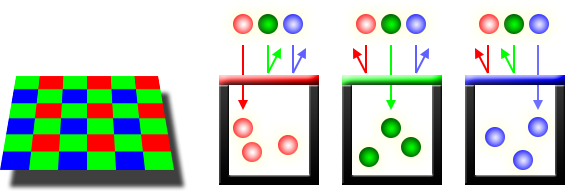
RGB Bayer Matrix

Monochrome Vs Colour Sensor
Filters
Applying narrowband filters specific to a monochrome camera allows for the capture of certain portions of the light spectrum—namely, Hydrogen, Oxygen, and Sulphur emissions. This can be compared to a filter letting through a single musical note in a symphony.
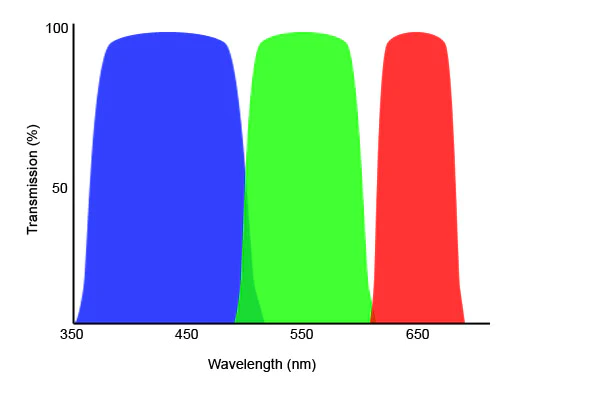
Visual spectrum filters (Luminance and RGB)
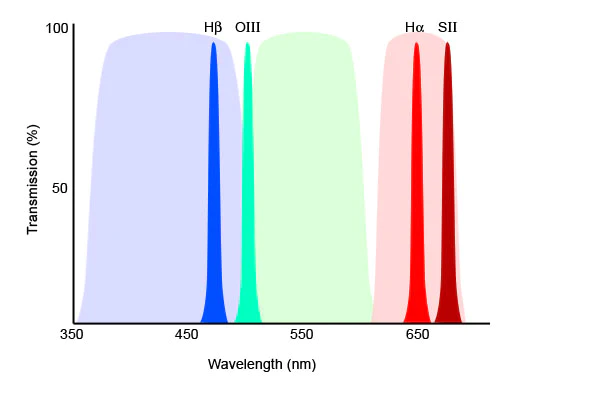
Narrowband Filters (Ha, Oiii and Sii)
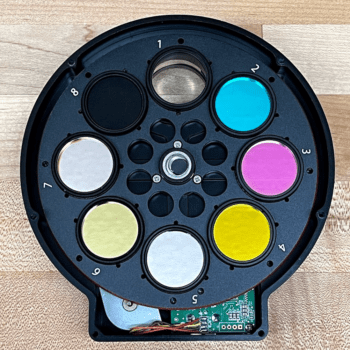
The Inside of a Filter Wheel loaded with both Narrowband and LRGB filters
Tracking mount and guiding
Precision tracking is crucial in astrophotography, demanding an error margin of less than 1 arc second (1/3600th of a degree). This precision results in sharp images and round stars, necessitating a special mount. Furthermore, a guiding system is utilised.
This auxiliary camera observes the sky and uses stars as reference points. Consequently, it instructs the mount to maintain pixel-level accuracy. A computer system manages the entire operation, automating each step for accurate positioning. This allows astrophotographers to revisit the exact celestial position, capturing photons to create layered images of our universe.
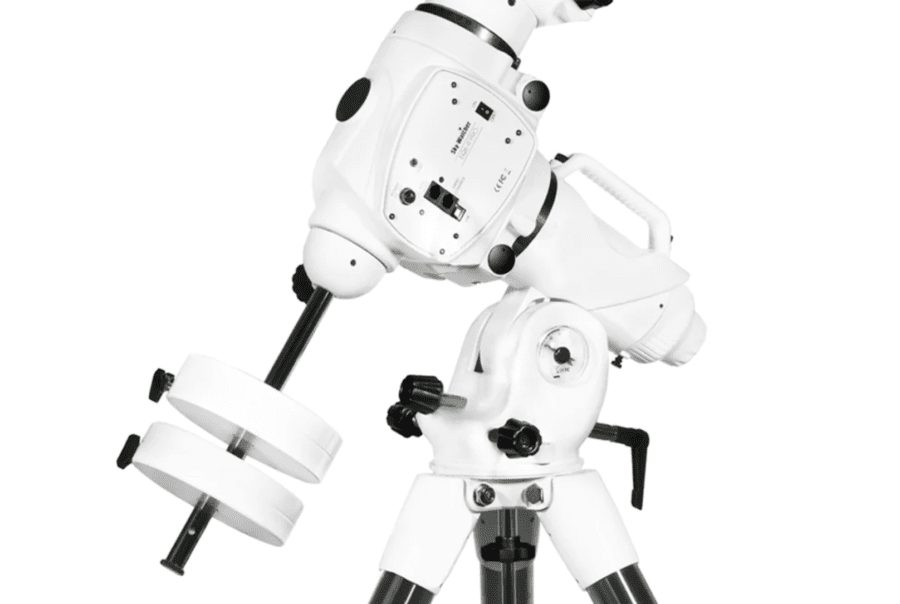
Skywatcher Eq6-R Equatorial Computerised Mount
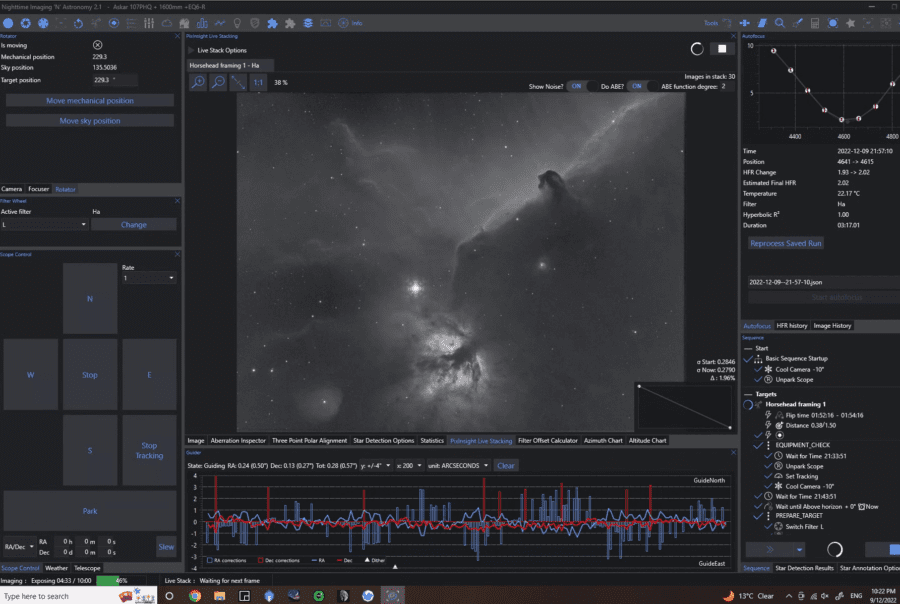
NIGHTTIME IMAGING ‘N’ ASTRONOMY
An astrophotography imaging suite
Image Processing
Image Stacking
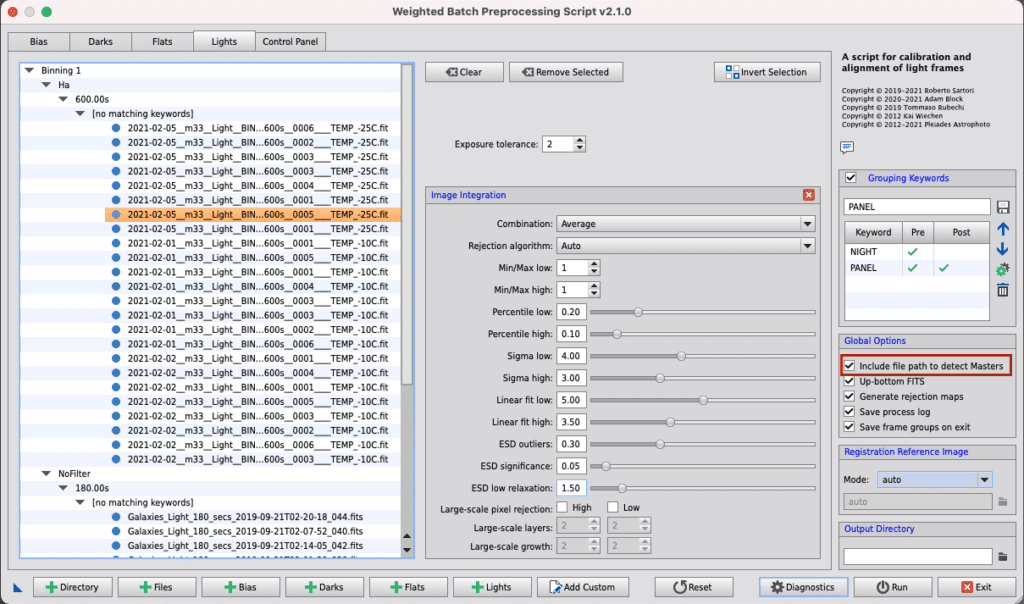 As we explore further, ‘stacking’ comes into focus. This process is key in astrophotography and requires layering hundreds of frames from each filter to create individual images. These frames, often spanning ten minutes each, are meticulously layered to improve the signal-to-noise ratio, thus enhancing the image quality. This step also reveals faint details overlooked in a single exposure.
Filter Combination and Colour Mapping
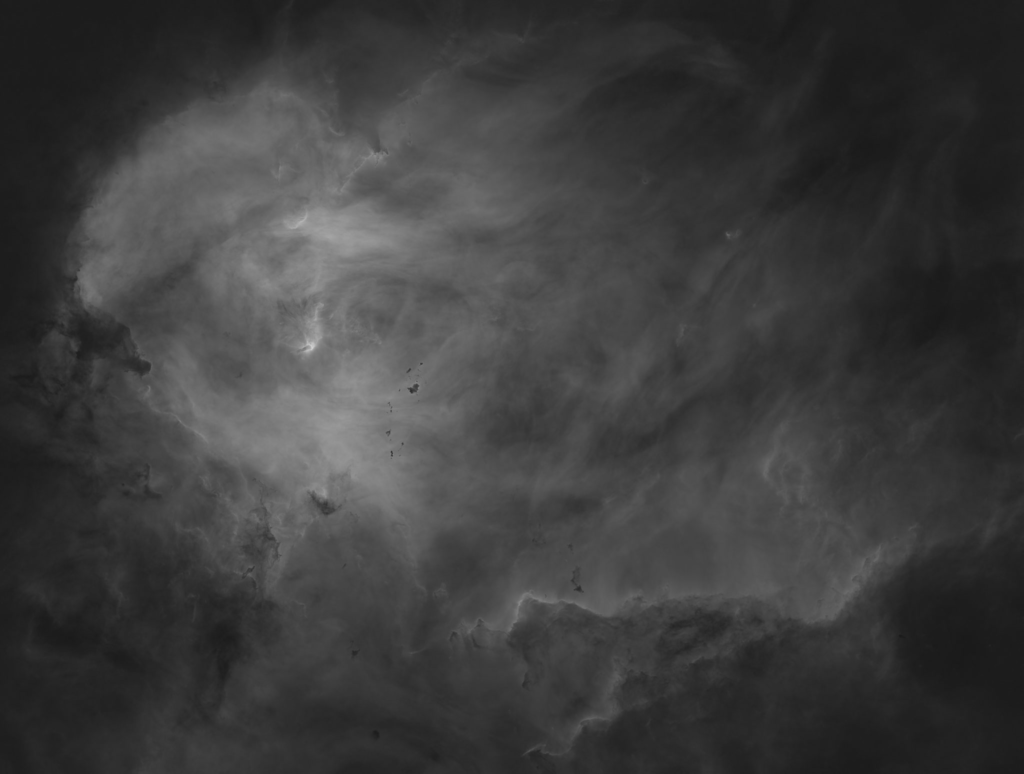
Hydrogen Alpha Emission (Ha)
In stacking, the first image is dedicated to capturing Hydrogen-alpha (Ha) emissions. Hydrogen, the universe’s most abundant gas, emits a unique spectral signature integral to our observations. Capturing these emissions is complex due to the need for long exposure times, often exceeding 20 hours of total exposure time.
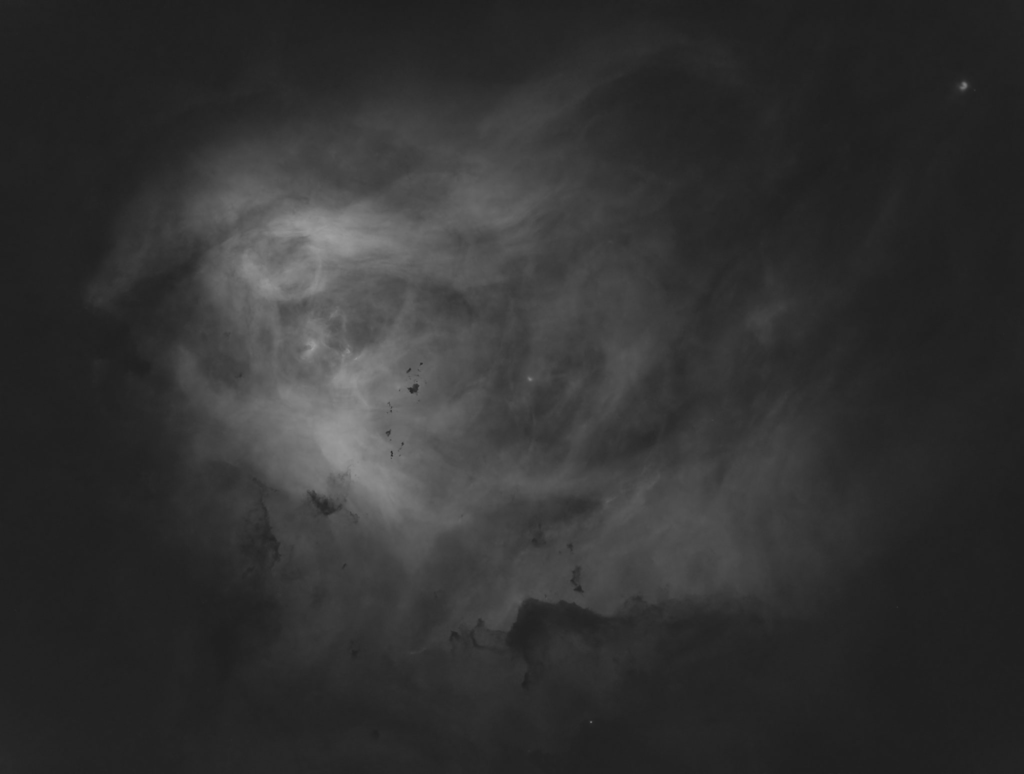
Oxygen III Emission (Oiii)
Moving on to the second image, we shift our focus to Oxygen III (Oiii) emissions. Oxygen is vital for life on Earth, but it’s also notable in the universe. It gives off a unique spectral signature when doubly ionised, known as Oiii emissions. Significantly, these emissions tend to appear in high-energy astronomical zones, such as around young, hot stars or remnants of supernovas.

Sulphur II Emission (Sii)
Next, we examine the Sulphur II (Sii) emissions in the third image. It provides another aspect to our spectral dataset. Sulphur, a usual element in the universe, ionises in places with intense ultraviolet light. These are typically nebulae, where new stars take birth. As these ionised sulphur atoms return to their initial state, they emit a particular wavelength of light – the Sii emissions.
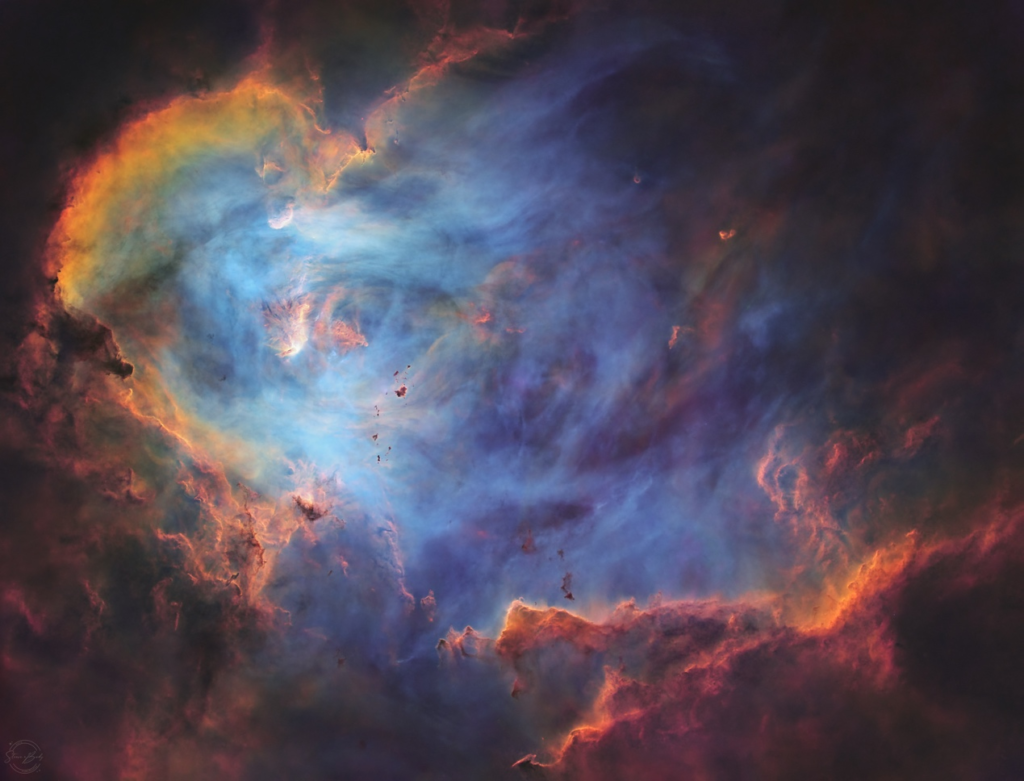
Colour Combination with Sii mapped to Red, Ha mapped to green and Oiii mapped to blue.
Subsequently, with these distinct images in hand, we reach our final stop in the journey – the fourth image. It showcases a colour mix, the SHO or Hubble palette. It’s a popular image processing technique of the Hubble Space Telescope. Sii emissions map to red, Ha to green, and Oiii to blue. This composite image brings forth a vibrant colour palette, encapsulating the interaction between the different gasses in this cosmic landscape.
Final image with stars in their natural colours added
Lastly, we introduce RGB stars into our cosmic picture, as shown in the fifth image. These stars, captured with RGB filters, display in their natural colours. They help provide an accurate representation of the celestial scenery. This step marks the end of our image assembly process, showing the detailed and careful nature of astrophotography.
The Future of Astrophotography: 3D Nebulae Conversion and VR Experience
When Art Meet Science
One of the things that drives this work is curiosity about how people actually experience these images, and what that experience does to them. A well-made astrophotograph can stop someone in their tracks, not just because it’s visually striking, but because of what it implies about scale, time, and our place in it. That emotional response is something I want to understand better and design for more deliberately.
That interest sits at the centre of my current PhD research at Griffith Film School in Brisbane, where I’m bringing together the different strands of my background into a single project: storytelling, film design, music composition, astrophotography, and immersive technology including VR, planetarium-scale projection, and spatial audio formats such as Dolby Atmos. The goal is to build experiences that don’t just present astronomical data, but make it felt, creating moments of genuine awe that also carry real scientific content.
The technical foundation of the 3D work draws on data from the ESA’s Gaia telescope, launched in 2013, which has produced the most detailed three-dimensional map of the Milky Way to date by observing over a billion stars and tracking their positions, distances, movements, and brightness. I’ve developed a method for extracting stars from my images and mapping them accurately in space using Gaia data, and I’m currently extending that approach to gaseous emission structures within nebulae.
For the nebulae themselves, the techniques I’m exploring include radio interferometry to map the distribution of molecules and dust, spectral line analysis to estimate the velocities of nebula components via Doppler shift, polarimetric imaging to reveal magnetic field structure, and hydrodynamic simulations to model how gas, radiation, gravity, and magnetic fields interact within these structures.
What’s shown here represents some early sketch work from the project. The research is ongoing. Updates are posted in the news section.
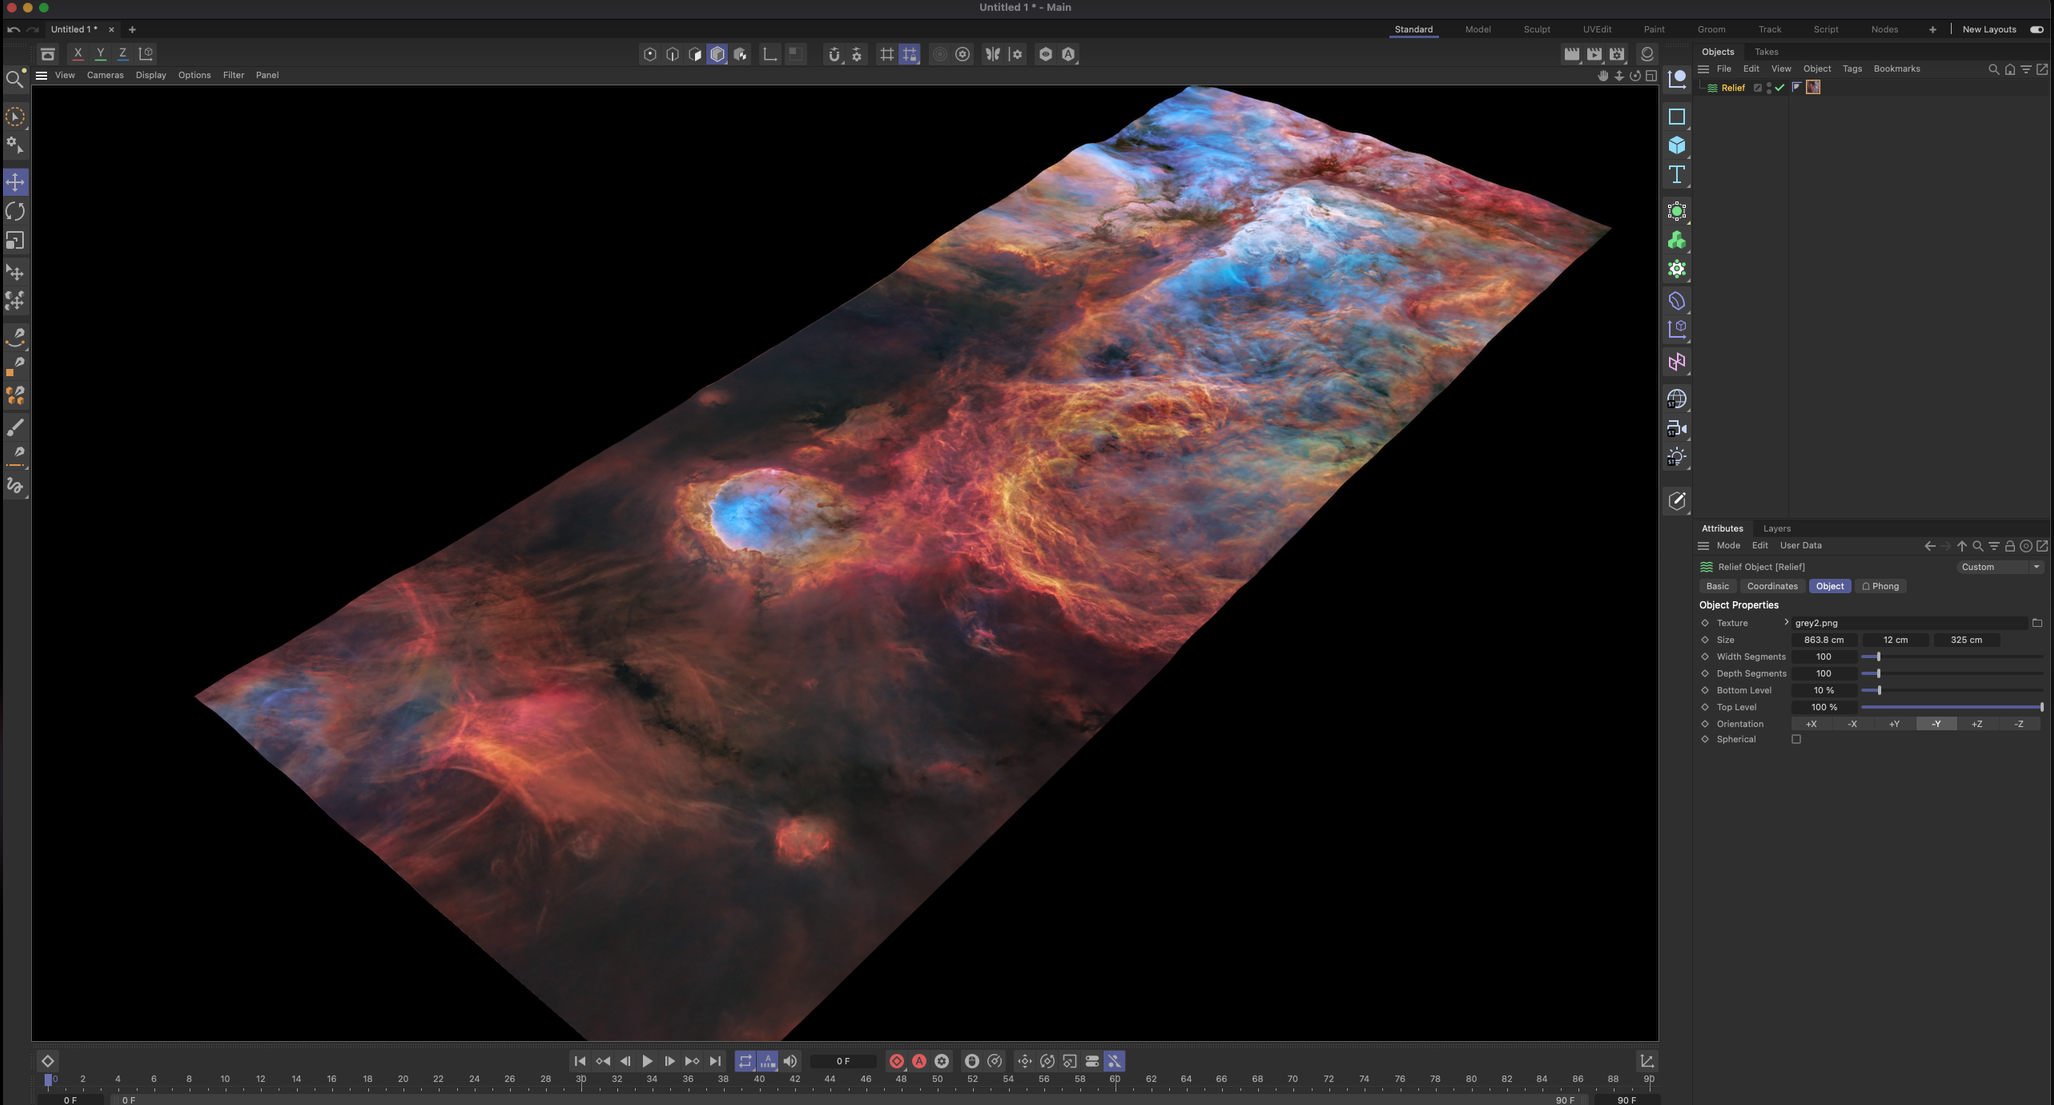
Relief Map of the nebulosity within the Carina Nebula built in Cinema 4D
The Southern Tadpoles with accurate 3D Star mapping
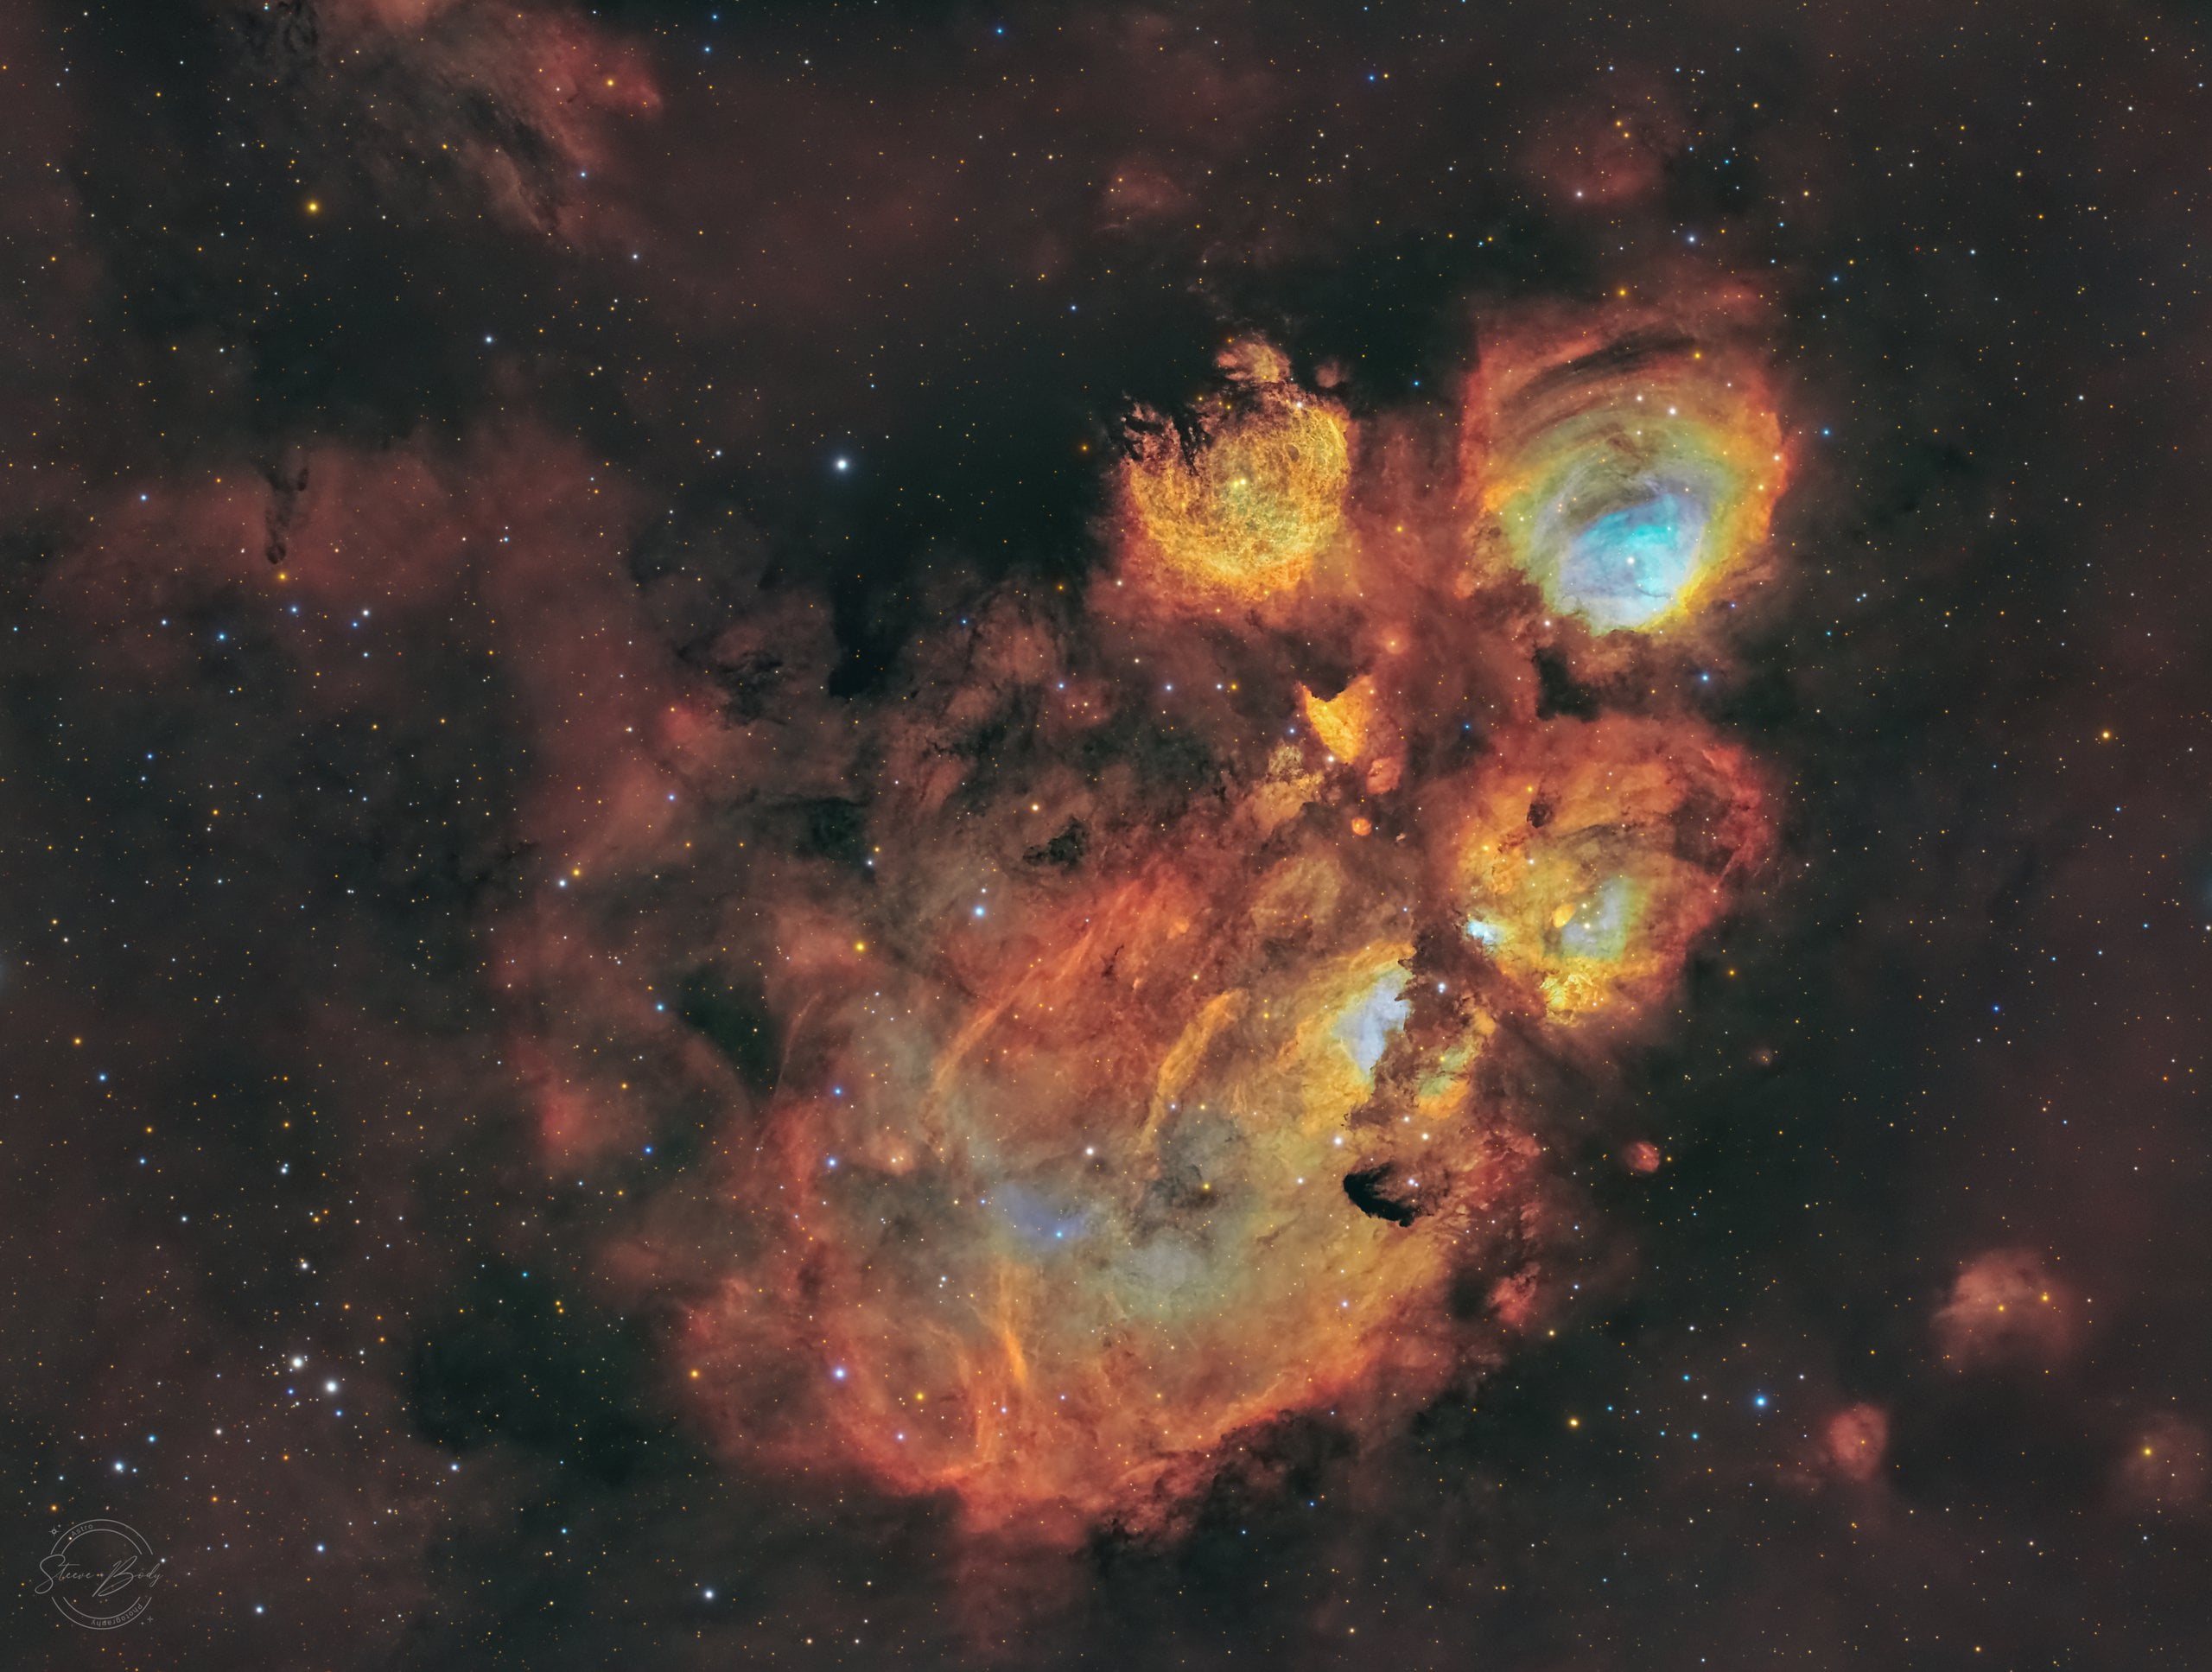
The Cat Paw Nebula with accurate 3D Star mapping
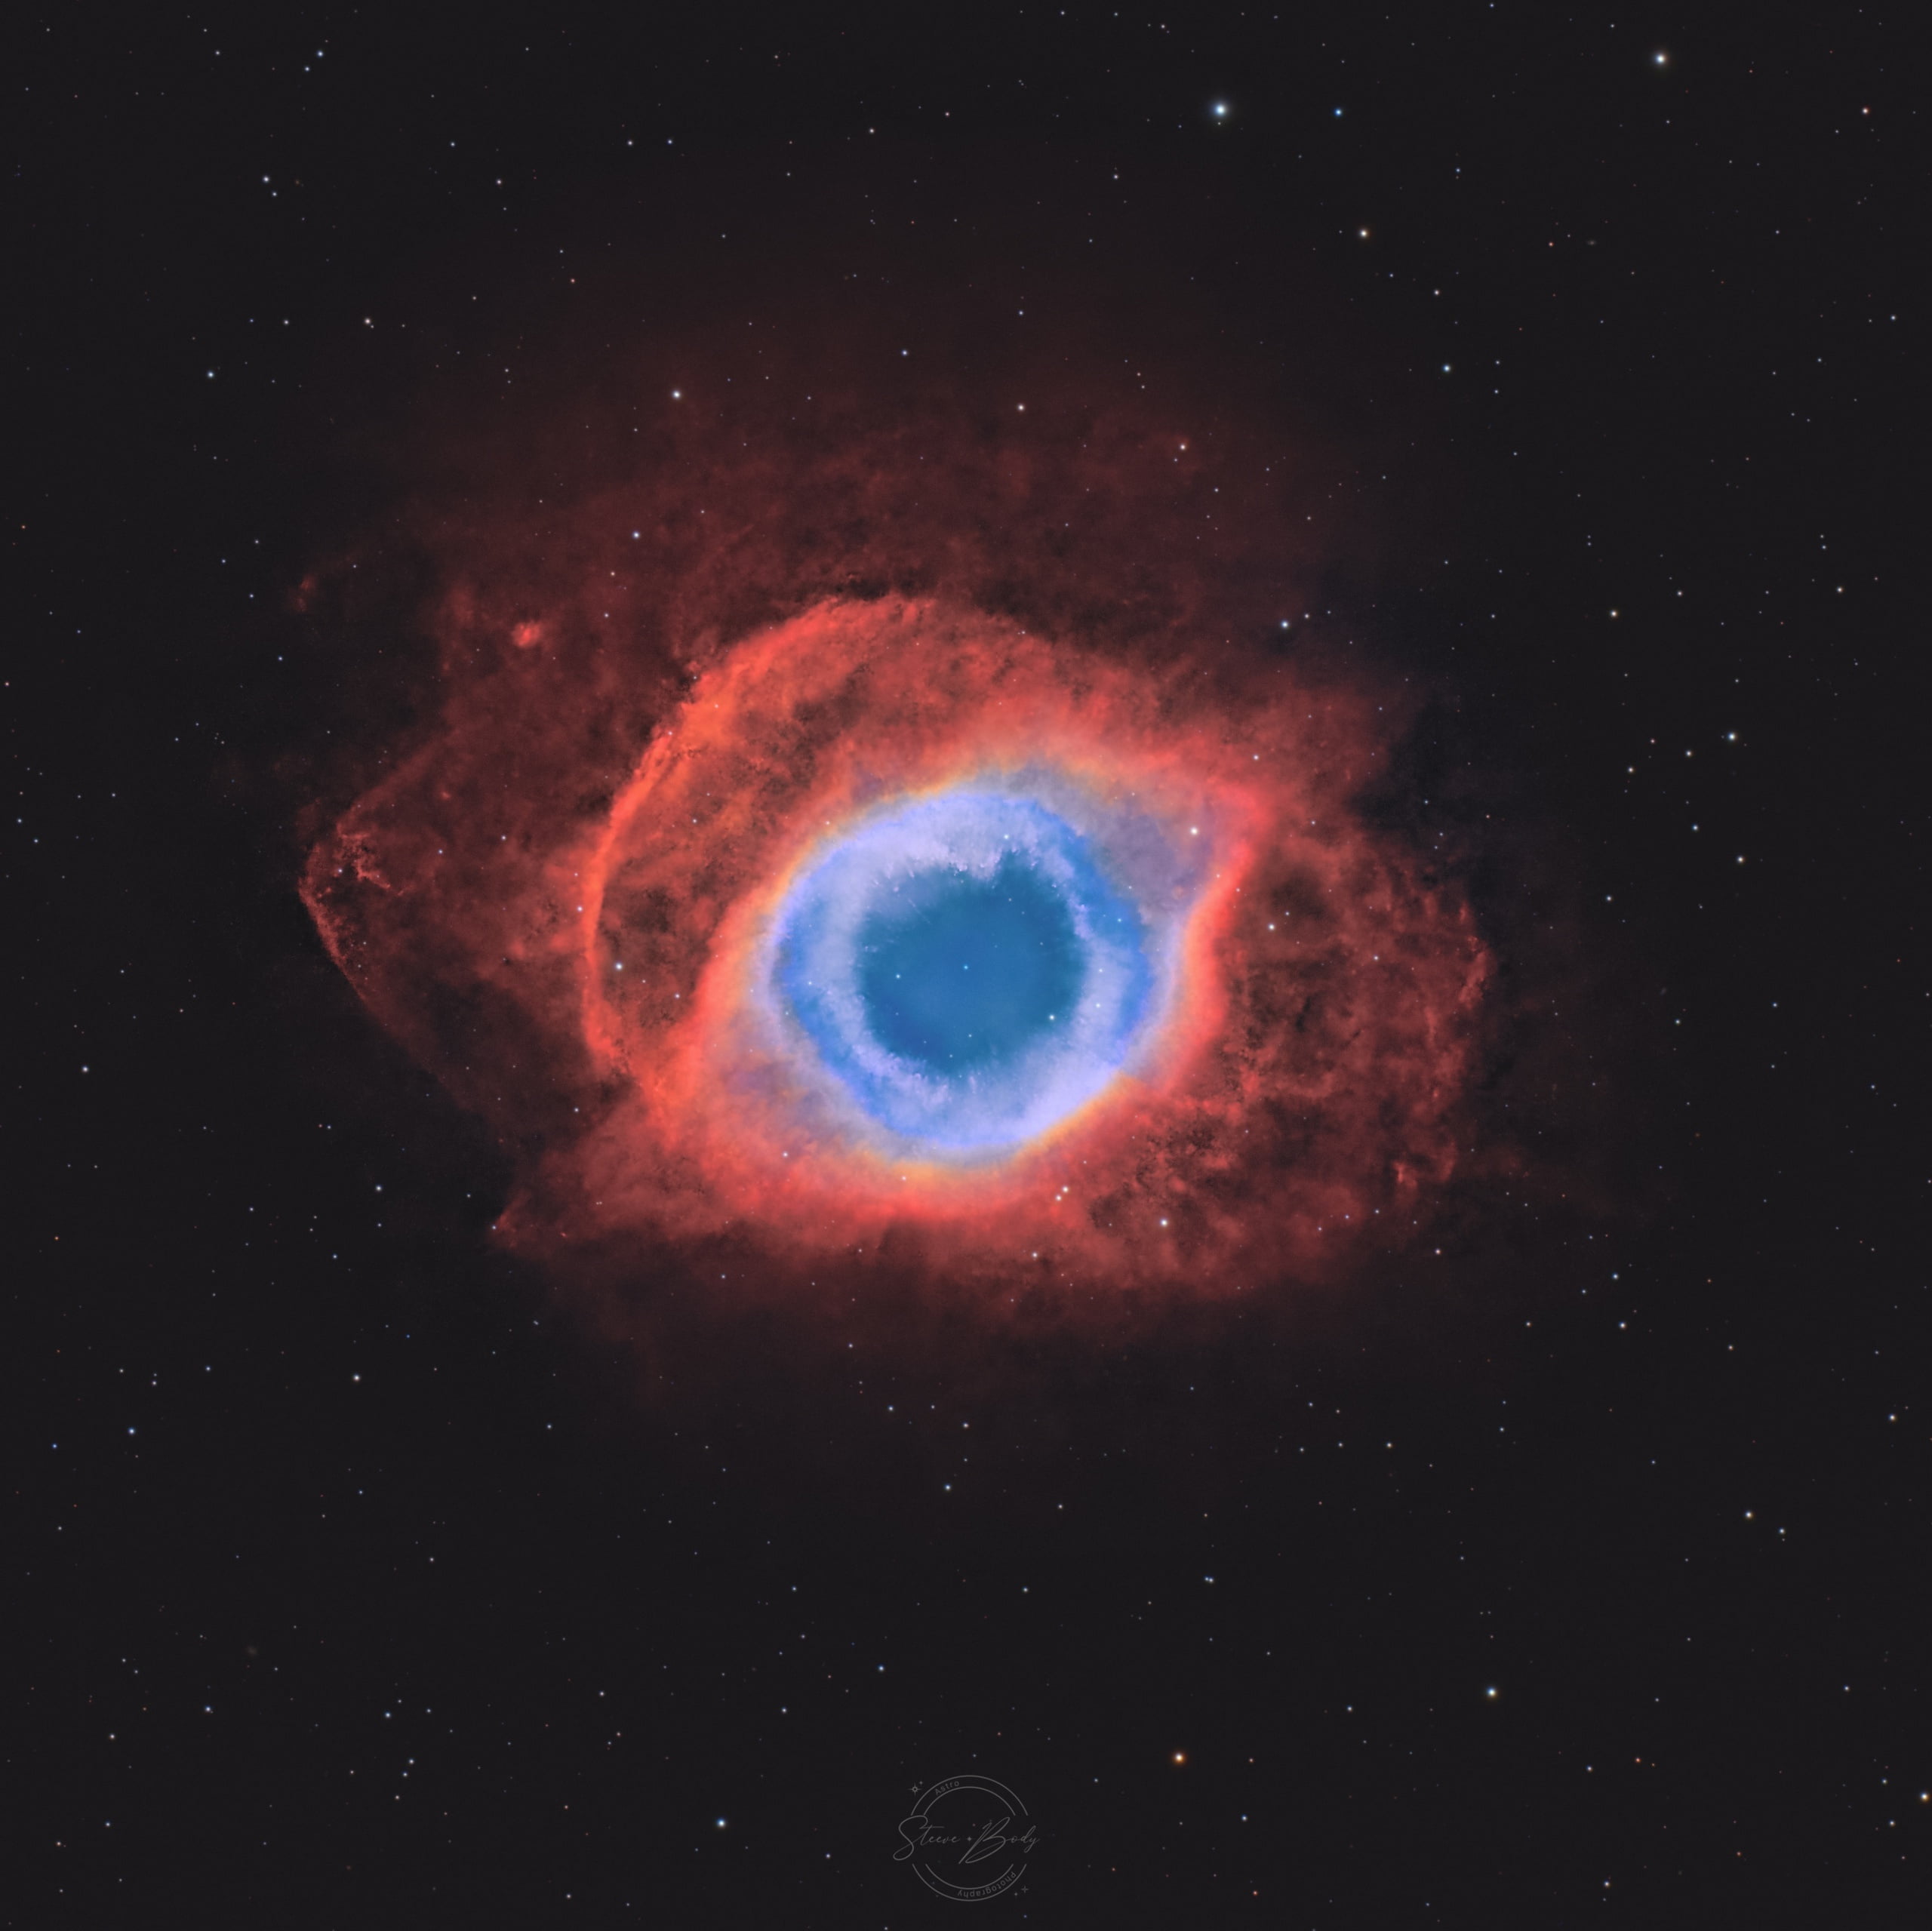
The Helix Nebula with accurate 3D Star mapping